Blog

  • Brioche French Toast Casserole

    Brioche French Toast Casserole

    Quick and Easy Brioche French Toast Casserole

    Mother’s Day is taking on a bit of a twist this year. Since we can’t have family over or go out to brunch, we moms deserve a day off of cooking, I have decided to dedicate this Mother’s Day recipe to all the awesome moms out there, especially my mom!

    My mom has passed on a lot to me: her blue eyes, her love of family fun, and walking the fine line between pure Momma Love and overprotective neuroticism (think Beverly Goldberg without the shoulder pads). Well- she still might come over wearing her 80’s jumpsuit with the big white Reebok shoes. I know that I have crossed over to my mom’s level of neuroticism when my kids sarcastically start calling me, “Bev”.

    My kids love French toast, but let’s face it, standing in front of a skillet for 30 minutes making 15 pieces of French toast is not what I envisioned for Mother’s Day. That’s why I love this recipe, you can prep it in 5-minutes and pop it in the oven. My kids like to drizzle syrup on their individual piece, rather than on the entire casserole.

    Quick and Easy Brioche French Toast Casserole

    Brioche French Toast Casserole
    Author: Momma Chef
    Prep time:
    Cook time:
    Total time:
    Serves: 9
    Ingredients
    • 1 14-16 oz. loaf brioche bread
    • 2 ½ cup Whole or 2% Milk
    • 6 eggs
    • ½ cup brown sugar
    • 1 tbsp. vanilla
    Instructions
    1. Slice brioche bread into 1” slices and then cut those into 1” cubes.
    2. Spray a 9×13 baking dish with cooking spray and coat it well.
    3. Layer bread into a greased baking dish.
    4. In a medium bowl whisk together milk, eggs, brown sugar, and vanilla and pour evenly over the bread.
    5. I like to let this sit in the refrigerator for at least 2 hours and if possible, overnight.
    6. When ready to bake, preheat oven to 350 degrees and bake uncovered for 40-45 minutes, or until a toothpick comes out clean.
    7. Remove from the oven and let it sit for 5-10 minutes before serving.


    Quick and Easy Brioche French Toast Casserole

    Like it? Pin it!

    Quick and Easy Brioche French Toast Casserole

    ORDER 6-MINUTE DINNERS (AND MORE!)

    6-MINUTE DINNER (AND MORE!)

  • Kid-Approved Easy and Delicious Hidden Zucchini Muffins

    Kid-Approved Easy and Delicious Hidden Zucchini Muffins

    Unless your kids are watching you make this recipe, they will have no idea that you just snuck zucchini into their favorite muffins! You can also add in some chocolate chips, and they become the kids’ dessert. If your kids don’t mind the addition of zucchini, this is a great recipe to make together. You can also substitute 1 banana in place of 1 of the zucchini and see which recipe your kids like most! And best of all, the muffins are a one-bowl and six-ingredient recipe. Enjoy!

    Kid-Approved Easy and Delicious Hidden Zucchini Muffins
    Author: Momma Chef
    Prep time:
    Cook time:
    Total time:
    Serves: 12-14
    Ingredients
    • 1 ½ c. whole wheat flour
    • 2 peeled and grated zucchini
    • ½ c. honey
    • 1 tsp. baking soda
    • 2 large eggs
    • 1/3 c. vegetable oil
    Instructions
    1. In a large mixing bowl, add all six ingredients above and blend with a hand mixer for three minutes.
    2. Fill greased or paper-lined [url href=”https://capitaloneshopping.com/p/muffin-pan-12-well-nonstick-cupc/GG9GNFXQQR?run=85a2f1c9-a443-4aa8-a481-4ae2fb5dc6e6″ target=”_blank”]muffin tin[/url] half full.
    3. Bake at 375° for 17-19 minutes or until a toothpick inserted near the center comes out clean.[br]
    Tips and Tricks:
    1. You can add ½ cup chocolate chips (my kids prefer semi-sweet).
    2. If your kids like bananas, I will substitute out 1 banana in place of 1 zucchini.
    3. The muffins will stay fresh in an airtight container or Ziplock bag for two days. After that, put them in the refrigerator.
    4. If refrigerated, put the muffins in the microwave for 20 seconds to warm before serving.
    5. I use [url href=”https://capitaloneshopping.com/p/muffin-pan-12-well-nonstick-cupc/GG9GNFXQQR?run=85a2f1c9-a443-4aa8-a481-4ae2fb5dc6e6″ target=”_blank”]muffin tins[/url] and cups which makes it more fun for the kids. If you use them, spray them with Pam before filling.

    Like this recipe? Pin it!

    Super Easy and Kid-Approved Delicious Hidden Zucchini Muffin Recipe

  • HEARTY BEEF AND VEGGIE STEW

    HEARTY BEEF AND VEGGIE STEW

    This recipe dates back at least 15 years when I was on a kick of using my newly gifted slow cooker. At the bottom of the box was a stapled book of recipes. There was one for beef stew, and I thought, “Why not?” Believe me—that recipe included more than six minutes of prep, for sure! I was chopping, slicing and dicing. I was searing and using multiple pans. The stew turned out great, but even in those bygone days before kids, I needed a stew recipe with less prep and one pan. And, voila! I created a way to make delicious beef stew without all the fuss.

    HEARTY BEEF AND VEGGIE STEW
    Author: Momma Chef
    Prep time:
    Cook time:
    Total time:
    Serves: 6
    Ingredients
    • 2½ pounds (1.1 kg) beef stew meat, cubed
    • 2 tablespoons (30 ml) extra-virgin olive oil
    • 2 large carrots, peeled and diced
    • 3 medium-sized potatoes, diced
    • 2 cups (480 ml) tomato juice
    • 2 cups (480 ml) beef broth
    Instructions
    1. Preheat the oven to 300°F (149°C), and set a rack in the lower-middle position.
    2. In a large Dutch oven, heat the olive oil over medium-high heat.
    3. Add the cubed stew meat, and sear for about 3 minutes per side.
    4. Remove the pot from the heat, and add the carrots, potatoes, tomato juice and beef broth. Stir everything together, and cover the pot.
    5. Carefully put the pot in the oven, and cook for 2 hours or until the meat is very tender.
    6. Remove from the oven, and season with salt to taste.
    7. Alternatively, you can make this in the slow cooker: First, sear the meat in a pan with the olive oil per the instructions above. Then add the meat, carrots, potatoes, tomato juice and beef broth to the slow cooker, and cook on low for 6 hours or high for 3 hours, until the meat is very tender.
    8. TIP: Carrots and potatoes are my favorite veggies in the stew, but you can use other variations, such as peas, canned tomatoes or any of your favorites.

    Like it? Pin it!

  • Sweet and Spicy Asian Cucumber Salad

    Sweet and Spicy Asian Cucumber Salad

    Sweet and Spicy Asian Cucumber Salad

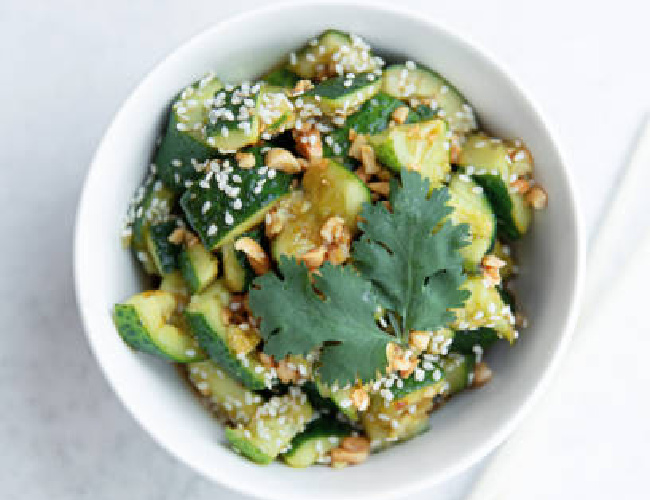
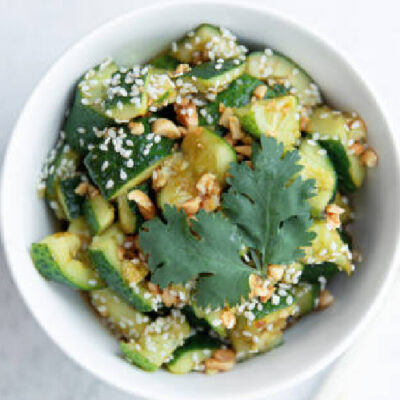
    You will love the simplicity of this delicious dish, which started during my flourishing garden of fresh cucumbers. Usually, my tomatoes grow like crazy, but this year it was cucumbers. I had just picked about 25 of them and other than sharing them with friends and family, I wanted to come up with something different to make by using cucumbers as the main ingredient. So, I grabbed a few and this dish was created. It was definitely a hit and I have made it several times already in the past couple of weeks. You can make it spicier by adding in some dried chili peppers. Also, with just a few ingredients, it is a great last-minute side dish with a beautiful presentation. When serving it to company, I like to sprinkle it with fresh chopped flat-leaf parsley right before serving. Enjoy!

    Sweet and Spicy Asian Cucumber Salad
    Author: Momma Chef
    Prep time:
    Total time:
    Serves: 4
    Ingredients
    • 3 Japanese, Persian, or small English Cucumbers
    • 3 tablespoons rice or apple cider vinegar
    • 1 tablespoon honey
    • 2 teaspoons soy sauce, regular or gluten-free
    • 2 teaspoons sesame oil
    • 1 teaspoon chili sauce or sriracha
    Instructions
    1. Slice the cucumbers thin and throw all of the ingredients above into a large Ziploc bag.
    2. Close and bag and shake to combine all ingredients and coat the cucumbers.
    3. Place in the bag in the refrigerator and let the cucumbers sit in the marinade for at least 2 hours, up to overnight.
    4. You can serve them as-is or sprinkle them with sesame seeds and/or parsley.


    Like it? Pin it!

    Sweet and Spicy Asian Cucumber Salad

  • Crispy Oatmeal Raisin Cookies

    Crispy Oatmeal Raisin Cookies

    Crispy Easy Oatmeal Raisin Cookies

    Crispy Oatmeal Raisin Cookies
    Author: Momma Chef
    Prep time:
    Cook time:
    Total time:
    Serves: 20 cookies
    Ingredients
    • 1 cup self-rising flour
    • 1/2 cup packed brown sugar
    • 1 large egg
    • ½ cup (1 stick) butter or margarine, softened
    • 1 cup quick-cooking or instant rolled oats
    • 1/2 cup packed raisins
    Instructions
    1. Preheat the oven to 350°F.
    2. Add the eggs and softened butter to a large mixer bowl and with a hand mixer on medium speed beat together for 1 minute.
    3. Add in the flour, brown sugar, and oats and mix on medium speed for another 2 minutes, until everything is well combined.
    4. Then with a spoon stir in the raisins.
    5. Drop the batter in teaspoonful onto baking sheets lined with parchment paper, about 2 inches apart.
    6. Optional- With the back of a small glass, lightly push down the cookies so they lay flat, this is how you get them to bake up crispy.
    7. Bake the cookies for about 9-11 minutes or until the bottoms are golden brown.

    Like it? Pin it!

    Crispy Easy Oatmeal Raisin Cookies

  • The Best 4-Ingredient Peanut Butter Cookies

    The Best 4-Ingredient Peanut Butter Cookies

    Easy 4-Ingredient Peanut Butter Cookies

    My 10-year-old (and TikTok) get most of the credit for this recipe. When your son comes in the kitchen asking to bake together and promising it won’t make a mess, it’s hard to say no. He had found a recipe on TikTok that he wanted to make, but after many times of us trying those 20-second recipes that claim to be “so easy”, I was not too optimistic. We went over the recipe, made some additions and changes, and 15 minutes later, these amazing cookies came out of the oven. They were so good that not only did he eat 3 after they came out of the oven, I let him have them for breakfast this morning. They have peanut butter = protein, so I shouldn’t feel too guilty, right?

    This is a great recipe to make with your kids, they can even make it on their own after you go over the instructions. These were even better the next day after they crisped up a bit. Hope you enjoy these as much as we did!

    4-Ingredient Peanut Butter Cookies
    Author: Momma Chef
    Prep time:
    Cook time:
    Total time:
    Serves: 12 cookies
    Ingredients
    • 3/4 cup peanut butter
    • 1/4 cup sugar
    • 1 teaspoon vanilla
    • 1 egg
    Instructions
    1. Preheat the oven to 350 degrees.
    2. Mix all of the ingredients above in a small bowl until well combined.
    3. Using a tablespoon, form dough into 1-inch balls with the palms of your hands. Place on parchment paper-lined baking sheet.
    4. This recipe should make 12 cookies.
    5. You can then use a fork to slightly press down the cookies in both directions to make a pretty design.
    6. Place the baking sheet into the oven and bake for 8-10 minutes, making sure the bottoms do not burn.
    7. Let cool and enjoy!

    Like it? Pin it!

    Easy 4-Ingredient Peanut Butter Cookies

  • Parchment Baked Lemon Rosemary Salmon “Salmon En Papillote”

    Parchment Baked Lemon Rosemary Salmon “Salmon En Papillote”

    Parchment Baked Lemon Rosemary Salmon

    I remember my excitement at a fundraiser, seeing a cooking class at a local upscale restaurant on the silent auction list. I b-lined my way straight for the bidding sheet and was ecstatic when my bid won the class. I guess a room full of sports memorabilia was a bit more appealing to that crowd than spending 4 hours in a restaurant kitchen, but for me, it was the perfect winning item!

    This class was over 15 years ago and I still remember everything that we made. One of the best techniques was learning how to cook parchment-baked fish. That class taught us seabass, but for this recipe, I am going to use salmon because it’s much easier to find and seems to be a favorite among most families. For those that do not cook salmon often, I will let you in on a little secret; salmon is not only delicious, it is rich in omega-3 fats which help boost your brain and cardiovascular health. And like all of Momma Chef’s creations, this recipe is quick, easy and scrumptious. Enjoy this recipe for Parchment Baked Lemon Rosemary Salmon AKA, “Salmon En Papillote”.

    Parchment Baked Rosemary Salmon
    Author: Momma Chef
    Prep time:
    Cook time:
    Total time:
    Serves: 4
    Ingredients
    • 1 1/2 pound salmon fillet with skin
    • 1 lemon sliced into thin strips
    • 1 teaspoon whole black pepper
    • 1 teaspoon kosher salt
    • 4 sprigs rosemary
    • 1 tablespoon olive oil
    Instructions
    1. Preheat the oven to 400°F.
    2. Place the salmon fillet skin side down in the middle of a large piece of parchment paper approximately 20″x20″.
    3. Season the salmon with salt and black pepper.
    4. Arrange the lemon slices and rosemary on top of the salmon and drizzle with olive oil.
    5. Seal in the fish by folding the parchment paper over the prepared salmon and carefully roll the open edges toward the salmon in the center.
    6. Place sealed packet onto a baking sheet.
    7. Bake for 25 minutes until the salmon flakes easily.

    Like it? Pin it!

    Parchment Baked Lemon Rosemary Salmon

  • Grilled Corn with Sriracha Mayo

    Grilled Corn with Sriracha Mayo

    Grilled Corn with Chipotle Mayo

    Summer is by far my favorite season. Vitamin D, family time and summer camp! I love sitting on our patio, hosting barbecues and eating ice cream. My kids and I can hang out instead of battling over homework versus screen time. Nothing tasted and smells more like summer than corn right off the grill. Here in Chicago, we are getting teased, one day it’s sunny and in the 60’s followed by a rainy day in the 4o’s, so it’s hard to believe that summer is really around the corner. With the forecast next week showing a promise of warmer weather, I am giving you loyal followers the hope of a summer cookout with this easy recipe for Grilled Corn with Sriracha Mayo. I only add in a little Sriracha but if your family likes things spicy, you can double the amount. Enjoy!

    Grilled Corn with Sriracha Mayo
    Author: Momma Chef
    Prep time:
    Cook time:
    Total time:
    Serves: 4
    Ingredients
    • 4 fresh cobs of sweet corn
    • 1 teaspoon of fresh parsley, chopped
    • 1/2 cup low-fat mayonnaise
    • 1 teaspoon Sriracha sauce
    Instructions
    1. Remove the husks and silks from the corn.
    2. Place the corn on a warm grill and cook on low heat for 15-20 minutes, turning the corn once halfway during cooking.
    3. While the corn is cooking, in a small bowl mix together the mayo and Sriracha sauce.
    4. When the corn is cooked, remove it from the grill, spread a light layer of the Sriracha mayo over the corn, and sprinkle with the chopped parsley.
    5. Serve immediately.

    Like it? Pin it!

    Grilled Sweet Corn with Sriracha mayo

  • Vegetarian Red Beet Soup

    Vegetarian Red Beet Soup

    Vegetarian Red Beet Soup

    Winter hasn’t truly arrived until my family, and I have enjoyed our first bowls of this beet soup. That’s right. That’s what I said: Beet Soup. Friends don’t roll your eyes and turn the page. Put down that coffee and give yourself five minutes to make this unbelievably easy-to-prepare soup. Both you and your family will be so thankful that you did. All three of my boys and my husband absolutely adore it. The “hardest” steps in this recipe aren’t hard at all: (1) Thanks to Whole Foods, Costco, Trader Joe’s (and probably your local grocery chain), there are pre-cooked beets. Check! (2) You have to cut an onion. Easy (a little secret, I buy the container of fresh pre-cut onions as well)! (3) You have to puree batches of the prepared soup in a blender (optional but recommended). No problem! And do you know who likes to push buttons on blenders? Kids! Make them part of the process, and they’ll already be sold on tasting the creation they helped to make. Truly, the most difficult step of all will be waiting to try your first delicious bowl.

    Make sure to check out my tips on the additions in this recipe below that can be added to the soup. If I am making this as a side dish, I will make it as a vegetarian soup and love to puree it before serving. On a cold night when my family is craving a warm hearty soup, I will add meat to the soup, follow the instructions below.

    On a side note, as you may know, I’m excited to be one of Google’s paid early testers for their Thank with Google pilot program. Thank with Google is an experimental feature that allows you to purchase a virtual sticker and directly show your appreciation for content on my website. As a loyal supporter, you can now feel more connected and engaged because you have the ability to express yourself and share what my work means to you.

    I have loved seeing the variety of stickers and messages my readers have selected to date. And remember, every time you send a paid sticker, you can add a personal message which I enjoy receiving. For me, these virtual stickers translate into direct revenue to support the work that goes into the content that you are enjoying on my blog.

    You can find the Thank with Google feature in multiple places on my site, including the top and floating at the bottom of each blog post. If you try it out, let me know what you think! Thanks as always for your support.

    Vegetarian Red Beet Soup
    Author: Momma Chef
    Prep time:
    Cook time:
    Total time:
    Serves: 6
    Ingredients
    • ¼ cup olive oil
    • 1 medium yellow onion, chopped
    • 1 (48-ounce) box of vegetable broth
    • 1/4 cup tomato paste
    • 1 (8-ounce) box of cooked red beets, diced
    • 1 tablespoon smoky paprika
    Instructions
    1. In a large soup pot, sauté the onion in olive oil over medium heat for 3 minutes.
    2. Add in tomato paste and mix well.
    3. Pour in the vegetable broth, beets and paprika, mix well.
    4. Partially cover and cook for 30 minutes.
    5. Salt to taste.
    6. Remove from the heat and serve as it, or you can puree the soup in a blender, food processor or soup immersion until smooth.
    7. You can also make this in the crockpot/slow cooker on high for 4 hours. [br]
    Tips:
    1. My favorite beets to use in this recipe are by the brand, “Organic Love Beets”. You can find these in the refrigerated section of most grocery stores.
    2. Once the soup is pureed, you can mix in some toppings such as sour cream, diced parsley, and coconut milk.
    3. If you want to add meat to this recipe, when you are cooking the onions, add in 1 pound diced stew meat, add in the rest of the ingredients, cover the pot and cook in the oven at 300 degrees for 3 hours. Do not puree this soup if you are adding in the beef.
    4. My personal favorite is to puree the soup and then mix in some low-fat sour cream.

    Like it? Pin it!

  • Creamy Brussels Sprouts and Fig Soup

    Creamy Brussels Sprouts and Fig Soup

    Creamy Brussels Sprouts and Fig Soup

    My boys love, love, love soup. It’s an easy and creamy way to sneak some extra veggies in their diet, too. With a loaf of crusty French bread or croutons, they will demolish crocks of soups and stews like an NFL football team. In all honesty, my youngest one does not know there are Brussels sprouts in this soup, we call it “Veggie Soup”. Whatever it takes, right? But, buyer beware, if you have not made Brussels sprouts before, there can be a strong smell that takes some getting used to, it’s worth it for us since my whole family loves this soup. Enjoy!

    Creamy Brussels Sprouts and Fig Soup
    Author: Momma Chef
    Prep time:
    Cook time:
    Total time:
    Serves: 8
    Ingredients
    • 1 pound Brussels sprouts cut in half
    • 2 tbsp. olive oil
    • 1/2 cup diced figs (stems trimmed off)
    • 1 cup chopped yellow onion
    • 5 cups (40 oz.) vegetable or chicken broth
    • 1 tsp. salt, plus more to taste
    Instructions
    1. In a large saucepan, sauté the onions in olive oil over medium heat for 3 minutes.
    2. Add in the Brussels sprouts and figs and cook for another 2 minutes.
    3. Add the vegetable broth, salt, and mix.
    4. Cover partially and cook over medium heat for 45 minutes until Brussels sprouts are very tender.
    5. Puree soup in a blender, food processor, or soup emersion in batches until smooth.
    6. This recipe can be made in the slow-cooker/crock pot, just follow the first step of sauteeing the onions then put everything in the pot and cook on low for 6 hours.
    7. Salt to taste. [br]
    Tips:
    1. You can find pre-cut Brussels sprouts and onions in almost every grocery store.
    2. If you don’t like the taste of figs, you can omit them from this recipe.
    3. Make sure you blend this soup so the kiddos don’t see the hidden veggies!
    4. A great way to get kids to try this soup is to let them add small croutons.
    5. I like to make this soup the night before I am serving it. It can stay in the refrigerator for up to 5 days.

    Like it? Pin it!

    Creamy Brussels Sprouts and Fig Soup

  • Scrumptious Mandarin Orange Cake

    Scrumptious Mandarin Orange Cake

    Quick and Easy Mandarin Orange Cake

    My 8-year-old gets all of the credit for this recipe. Since we are all stuck at home, what’s a food blogger to do — cook! My youngest likes to swap out his “independent learning time” in the morning for some baking time with me and I am more than happy to oblige.

    Yesterday we made brownies, the day before banana muffins, somehow Nutella does it make its way into every snack. Today my son asked to make something with mandarin oranges and so we decided to make a mandarin orange cake. This cake took about 4 minutes to prep, the oven was not even at 350 degrees by the time the cake was ready to bake.

    This is definitely a recipe we will be making more often! The cake turned out delicious and my house smelled amazing! It was moist, flavorful and such a fun activity to make with your kids.

    Scrumptious Mandarin Orange Cake
    Author: Momma Chef
    Prep time:
    Cook time:
    Total time:
    Serves: 10 pieces
    Ingredients
    • 1 (15-18 ounce) package of yellow cake mix
    • 3 eggs
    • 1/2 cup avocado or canola oil
    • 1 (11-ounce) can mandarin oranges, undrained
    • 1 teaspoon vanilla extract
    Instructions
    1. Preheat oven to 350 degrees F.
    2. Spray a 9×13 inch pan or a 10-inch bundt cake pan with cooking spray.
    3. In a large bowl, combine cake mix, eggs, oil, vanilla, and beat until smooth (about 2 minutes). Add in the mandarin oranges with juice and lightly fold into the mixture until well blended.
    4. Pour batter into greased pan.
    5. Bake in the preheated oven for 35 to 40 minutes, or until a toothpick inserted into the center of the cake comes out clean. Allow to cool.

    Like it? Pin it!

    SCRUMPTIOUS MANDARIN ORANGE CAKE

  • Splurge-safe Low Carb and Keto Cheesecake

    Splurge-safe Low Carb and Keto Cheesecake

    Have you ever found yourself wistfully staring into your refrigerator, looking for something to satisfy your sweet tooth without busting your diet? What if you saw a cheesecake staring back at you? Most of us would forget about our diets, grab a fork, and enjoy a slice (or two), followed by a large serving of guilt. What if I told you that you could have your (cheese)cake and eat it too?

    Now came the challenge – how could I make a low-carb protein packed cheesecake that still tastes great? It started by using cream cheese as the main ingredient and a sugar substitute for white sugar. Then I added some lemon juice, vanilla and eggs. From these simple ingredients, I was able to create a low-carb, protein-packed crave-worthy, creamy cheesecake.

    Best of all, it’s a bonafide Momma Chef recipe. Like all of my Momma Chef creations, it’s quick, easy, and scrumptious — with only five ingredients, you can whip us this cheesecake in under five minutes! Here’s the delicious, satisfying, and SIMPLE recipe to healthy bliss.

    Splurge-safe Low Carb and Keto Cheesecake
    Author: Momma Chef
    Prep time:
    Cook time:
    Total time:
    Serves: 8
    Ingredients
    • 16 oz. low-fat cream cheese, at room temperature
    • 3 large eggs
    • 4 tablespoons liquid Keto Sweetner or 1/3 cup sugar substitute
    • 2 teaspoons vanilla extract
    • 1 teaspoon fresh lemon juice (optional)
    Instructions
    1. Preheat oven to 375 degrees.
    2. Place eggs in a large bowl and mix on medium speed for 30 seconds.
    3. Add in room-temperature cream cheese, liquid Nectevia, vanilla extract and lemon juice, blend until smooth.
    4. Pour mixture into greased pie dish and bake for 30 minutes, or until center is firm to touch.

    Like It? Pin it!

    Low Carb Cheesecake