Blog

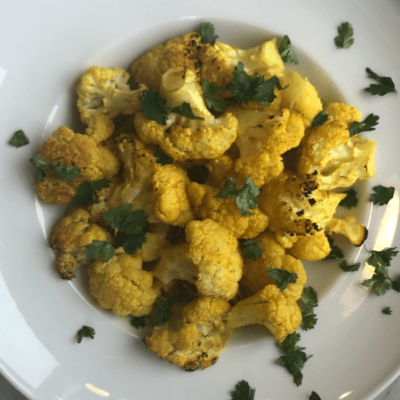
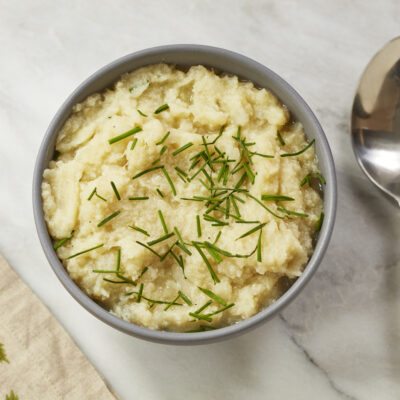
  • Healthy Cauliflower Mashed “Potatoes”

    Healthy Cauliflower Mashed “Potatoes”

    I started making this dish while on one of my 10 different diets of the year. This diet suggested cutting out the carbs of regular potatoes and substituting a healthier version with cauliflower. Little did I know how much I would love this dish and prefer it over the heavier mashed potatoes! I like to mix in some chives as well as sprinkle some on top to give the dish added flavor and presentation. Enjoy!

    Healthy Cauliflower Mashed “Potatoes”
    Author: Momma Chef
    Prep time:
    Cook time:
    Total time:
    Serves: 6
    Ingredients
    • 8 cups bite-size cauliflower florets (about 1 head or a 20 oz. bag of pre-cut florets)
    • 16 oz. vegetable stock (typically 1/2 of box)
    • 1 tsp. salt (adjust to taste)
    • 1 tsp. chopped chives (optional)
    Instructions
    1. Pour stock, cauliflower and salt in partially covered pot and cook over medium heat for 10-15 minutes until cauliflower is very soft.
    2. When cauliflower is soft, mash with a fork or blend with a hand mixer.
    3. Alternatively, you can make this in the slow cooker/crock pot on high for 2-hours.
    4. Sprinkle with chives (optional). [br]
    Tips:
    1. To add a little kick, I like to use Truffle salt rather then regular salt.
    2. You can add 1 tbsp. butter or margarine to make it a bit creamier.

    Healthy and Easy Cauliflower Mashed Potatoes Recipe

  • Delicious and Easy Bourbon Chicken

    Delicious and Easy Bourbon Chicken

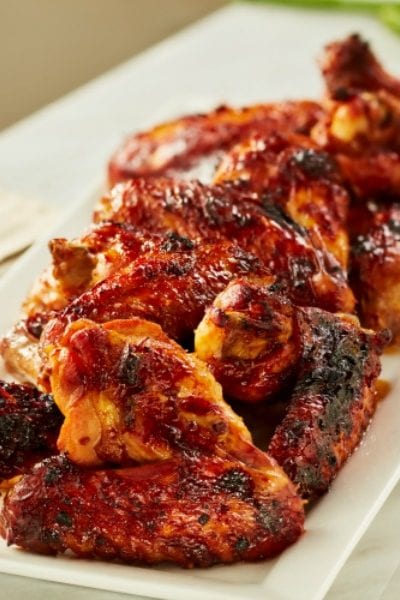
    Growing up, one of my favorite meals to pick up at the mall food court was delicious bourbon chicken. In fact, my brother and I used to go there weekly just to eat the chicken! You can imagine how devastated we were when the restaurant at the mall closed and we could no longer find our favorite dish. After trying several times to replicate the recipe, I finally came up with a very similar one. And it’s super easy! Probably for nostalgic reasons, it’s one of my favorite recipes on this blog. Enjoy!
    Delicious and Easy Bourbon Chicken
    Author: Momma Chef
    Prep time:
    Cook time:
    Total time:
    Serves: 6
    Ingredients
    • 2 lbs. boneless, skinless chicken thighs cut into 2” cubes
    • 1/4 c. Bourbon
    • 1/3 c. soy sauce
    • 1/3 c. packed brown sugar
    • 1 tsp. ground ginger
    Instructions
    1. Pour Bourbon, soy sauce, brown sugar and ground ginger into a gallon size Ziplock bag. Seal the bag and shake all ingredient to mix.
    2. Add chicken cubes, seal the bag again, and shake one more time to coat the chicken.
    3. Marinate several hours or overnight.
    4. When ready to cook, heat up wok or large frying pan over medium-high heat. Pour all ingredient from Ziplock bag into wok/pan and stir-fry over medium-high heat for 15 minutes. Mixing as it cooks until the sauce is thick and coats the chicken.
    Tips:
    1. I like to serve this with Trader Joe’s brown rice.
    2. If you are purchasing your chicken at a butcher or meat department, ask them to cut the chicken into 2” cubes.
    3. If you prefer white meat, you can substitute for cubed chicken breasts.

    Like this recipe? Pin it!

  • Simple and Delicious Apple Crumble

    Simple and Delicious Apple Crumble

    My oldest son gets all the credit for this dessert.  After a wonderful autumn day of apple picking in Chicago, my children requested many apple dishes, including an apple crumble. We quickly assembled the ingredients and popped the apple crumble in the oven. A wonderful smell permeated the house. It’s worth making just for the aroma! The cobbler became an immediate family favorite. I also make this dish often to bring to friends. It is best served with regular or dairy-free vanilla ice cream. Even if you’re not a fan of dairy-free, the apple cobbler is so delicious that you won’t even notice the difference in the ice cream!

    Apple Crumble
    Author: Momma Chef
    Prep time:
    Cook time:
    Total time:
    Serves: 10
    Ingredients
    • 6 Granny Smith apples cut into 2″ squares (peeling apples is optional)
    • 1 cup old-fashioned oats
    • 1/2 cup brown sugar
    • 3/4 cup whole-wheat flour
    • 1 tbsp. cinnamon
    • 1/2 cup avocado oil or melted coconut oil (or you can use any vegetable oil)
    Instructions
    1. Preheat oven to 375°F.
    2. Mix oats, sugar, flour, cinnamon and oil in a bowl.
    3. Spray 13×9 glass baking dish with nonstick spray.
    4. Add sliced apples to bottom of the dish.
    5. Sprinkle topping from the bowl over the apples.
    6. Bake for 25 minutes. [br]
    Tips:
    1. I save the time and do not peel the apples.
    2. This is best served with vanilla ice-cream (dairy free also a good option).

    Like this recipe? Pin it!


  • Last week, I hit the grocery jackpot…

    Last week, I hit the grocery jackpot…

    This post is sponsored by ConAgra, Danone, Amy’s Kitchen, and Good Food Made Simple. All opinions are my own.

    I don’t know about your house, but my kitchen has been transformed into a 24/7 diner. Kids are remote learning; grown-ups are remote working. With so many people in my home wandering through our kitchen ALL DAY LONG, I’m constantly on the lookout for quick ways to keep my family satisfied.

    Last week, I hit the grocery jackpot. I made a serious Frozen Food Haul. I’m talking organic, non-GMO foods that taste delicious. My cart was overflowing, but my grocery budget was intact. And you’ll never guess where I was? Walmart! They are marketing to my high-end tastes and my “I’ve got three kids” bank account.

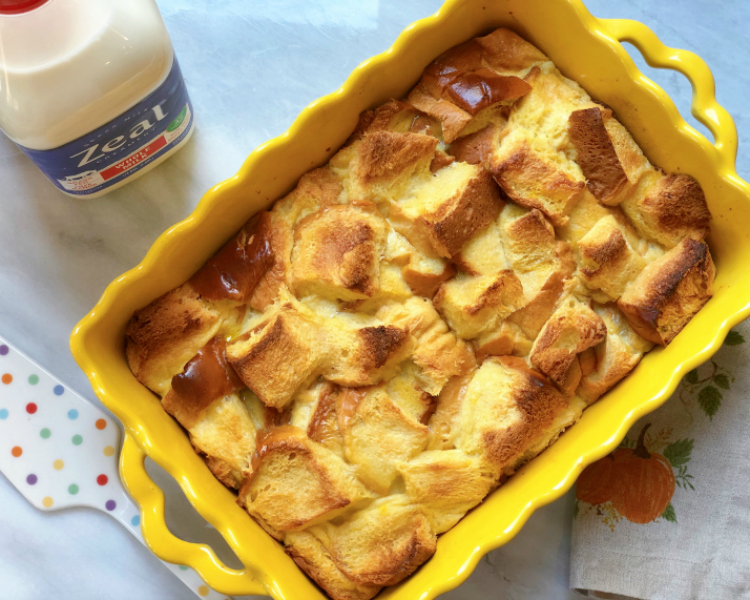
     Sneak a peek in my freezer this week and you’ll find some of my new favorites. For breakfast, we are loving Good Food Made Simple French Toast – it’s made with whole grains, and it’s chock full of protein to get my kids’ brains charged up for their day of learning. I personally love how the cinnamon flavor pairs with my cup of morning coffee.

     For lunch, my kids are rotating through Amy’s Kitchen Veggie Crust Pizza and Amy’s Kitchen Mac and 3 Cheese with Cauliflower.  If you’ve been a follower of Momma Chef, you know I can’t go for the orange powder macaroni madness – and neither can Amy’s Kitchen. I bought several boxes of the gluten-free three-cheese cauliflower bowl. It’s complete comfort food without the guilt. The boys love it! Another favorite is the cheese pizza, made with a sweet potato, broccoli, and cauliflower crust – but honestly, there’s no need to tell your picky eaters that. My kids love eating pizza, and I love that Amy’s Kitchen is helping me sneak some extra veggies into their diets.

    For something a little heartier, there are two entrees stacking the shelves of my freezer.  I’ve already raved an entire blog about the fabulous find of Marie Callender’s Chick-N Pot Pie made with Gardein Plant-Based Chick’nClick here for more of that yummy vegetarian concoction enveloped in a golden, flaky crust. It’s a convenient and meat-free spin on a comfort-food icon. And remember that delightful find of the protein-packed cinnamon French toast?  The same brand also carries some fabulous entrees. My current obsession is Good Food Made Simple Cauliflower Kung Pao. It’s like take-out without the MSG and extra nonsense. A medley of veggies and peanuts are served atop gluten-free noodles with a spicey and garlicky tamari sauce. (When my husband is eating a vegetarian meal by choice, I know it’s a keeper!)

     I’ve saved my favorite for last: So Delicious® Dairy-Free Frozen Dessert Bars. Yes, they’re vegan; yes, they’re made by a company committed to the global good. And, YES – they’re ridiculously delicious. You have to try the salted caramel! And you have to hide an extra box for yourself in the back of the freezer. Trust me: they disappear quickly.

    Give a shout-out to your favorite frozen food finds in the comments below. And maybe I’ll see you in the frozen food aisle at Walmart next week!
  • NEW YORK–STYLE CHEESECAKE

    NEW YORK–STYLE CHEESECAKE

    NEW YORK–STYLE CHEESECAKE

    If you’ve ever been intimidated by making a cheesecake, join the club. This iconic dessert can strike fear into any cook’s heart. No worries for you, though. This recipe will help you produce a deliciously creamy New York–style cheesecake that you’ll be proud to claim as your own. You’ll find that the addition of a little sour cream produces a texture as silky as Frank Sinatra’s voice. Start spreading the news, for this cheesecake is pure New York, New York.

    Today, most New Yorkers agree that a true slice of New York cheesecake is pure, unadulterated cheesecake. You don’t have to be a purist, though: fruit (cherries!), crumbled cookies (Oreos!) or crushed candy (Heath bars!) make terrific toppings.

    NEW YORK–STYLE CHEESECAKE
    Author: Momma Chef
    Prep time:
    Cook time:
    Total time:
    Serves: 8
    Ingredients
    • 2 eggs
    • 2 (8-ounce) packages cream cheese, at room temperature
    • 3⁄4 cup (granulated sugar
    • 1⁄2 cup sour cream
    • 2 teaspoons vanilla extract
    • 1 (9-inch) graham cracker pie crust (regular or gluten free)
    Instructions
    1. Preheat the oven to 350°F (177°C).
    2. In a large mixing bowl, add the eggs and, using a hand mixer, blend on medium speed for 30 seconds.
    3. Add the cream cheese, sugar, sour cream and vanilla to the eggs, and blend until smooth, about 3 minutes.
    4. Pour the cheesecake mixture into the pie crust, and bake uncovered for 55 minutes until the center is firm.
    5. Let the cheesecake cool in the refrigerator for at least 2 hours.
    6. More tips in the cookbook!


    Tracking PixelLike It? Pin it!

    NEW YORK STYLE CHEESECAKE

  • Kids’ Favorite Breakfast Parfait

    Kids’ Favorite Breakfast Parfait

    This is a sponsored conversation written by me on behalf of Delta® Greek Yogurt. The opinions and text are all mine.  Tracking Pixel

    Quick and Easy Kids Yogurt Parfait

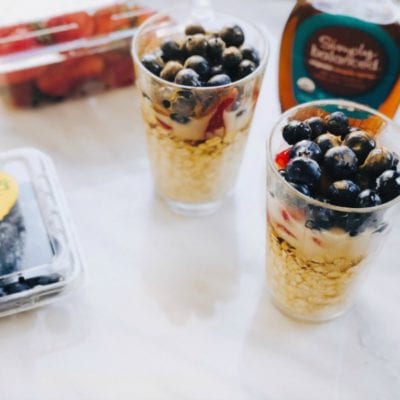
    Looking for a healthy breakfast that is also quick and easy? I have you covered! After hearing my kids for the 100th time ask for something other than pancakes or cereal, I knew it was time to be creative. I wanted them to eat something healthy in the morning, but honestly, time was of the essence. One Sunday evening, I looked in the refrigerator and pantry to see what I could put  together. In 5 minutes I had a Monday morning breakfast. Most of you probably already have all of these ingredients on hand, you can add-in or take out per your kids’ taste. They were definitely a hit and it didn’t hurt that my boys thought it was so cool to eat breakfast out of a martini glass.

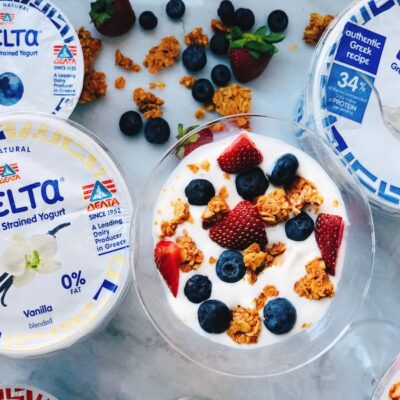
    Creamy Delta® Greek Yogurt is layered with fresh fruit, delicious granola and coconut flakes (I did omit the coconut flakes for my pickiest son). These can be made in a nice serving dish for an impressive brunch or in a jar for a make-ahead, grab-and-go breakfast. You can even make several at a time – they keep for about 2 days in the refrigerator!

    You have to appreciate that Delta® Greek Yogurt has been making yogurt for 70 years in Greece; it’s exciting to find something so authentic is now available at my local grocery.

    I also picked up some vanilla, blueberry, and strawberry yogurts for snacks. My family loved the delicious flavor (strawberry is my fav!) without the sour aftertaste that most Greek yogurts have. Plus, as a mom resolving to stock the kitchen with healthier choices, I’m glad to know that Delta Greek is non-GMO with no artificial growth hormones and no sweeteners. Plus, we all benefit from the extra protein boost each container provides

    For these parfaits, I made my first batch with Delta® Greek Yogurt, Plain, 0% Fat, but if your kids like it a bit sweeter, I would suggest using vanilla or strawberry flavored Greek yogurt or adding a splash of honey on the plain yogurt. Nothing beats using fresh fruit- I love to add blueberry, banana, and strawberries to this fruit parfait. Feel free to switch up the fruit according to what’s in season. I like to make a few of these ahead of time and keep them in the refrigerator so my kids can have a quick and delicious breakfast or snack. The yummy parfaits in these photos are made with strawberries, blueberries, and granola, and another variation is pineapple, banana, granola and coconut flakes.

    Quick and Easy Kids Yogurt Parfait

    Kids’ Favorite Breakfast Parfait
    Author: Momma Chef
    Prep time:
    Total time:
    Serves: 2 parfaits
    Ingredients
    • 2 Delta® Greek Yogurt, 5.3oz cups (you can use plain, vanilla or strawberry)
    • 1 cup sliced fresh fruit (can be pineapple, mango, strawberries, blueberries, banana etc.)
    • 1/2 cup granola
    • 1 tsp honey (optional)
    • 2 tbsp coconut flakes (optional)
    Instructions
    1. Spoon one Greek yogurt cup into a serving dish (if using honey, add 1/2 tsp to the yogurt).
    2. Layer with 1/2 cup fresh fruit.
    3. Top with 1/4 cup granola and 1 tablespoon coconut flakes.
    4. Repeat above for each parfait.

    This is a sponsored conversation written by me on behalf of Delta® Greek Yogurt. The opinions and text are all mine.

    Quick and Easy Kids Yogurt Parfait

    Quick and Easy Kids Yogurt Parfait

    Like it? Pin it!

  • Quick and Easy Creamy Cauliflower Soup

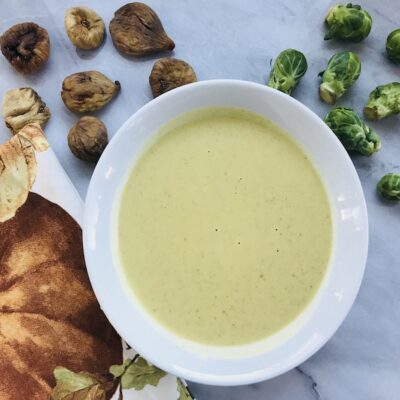
    Quick and Easy Cauliflower Soup

    I think it’s safe to say that I am not alone in thinking, I am so over 2020.

    As a mom with three kids, a dog, and my dear husband, I’ve spent years of trial and error figuring out the best ways to manage a (mostly) happy and (mostly) healthy household. The last nine or so months have forced us to make some changes that are beyond my control: Will my kids be in school next week? Is the soccer season canceled? Will our paychecks stay steady? Can I meet my mom for lunch next week? 

    All of these unknowns haven’t been easy to anyone, and it’s no surprise that many of us have been turning to food for comfort in these uncertain times. Sometimes my family is making good choices (crunchy apples for afternoon snacks) and sometimes… not so much (see the number of half-eaten quarts of ice cream in our freezer).

    I woke up this morning thinking about the hope that a new year can bring, so I’ve decided to ring in my resolutions early. With so many things in my family and in the world that are beyond my control, at least I can start by making some intentionally positive changes in my own life. As a creator and curator of recipes, an easy place for me to start is the healthy makeover of some of my family’s favorites.

    My boys love, love, love soup. It’s an easy and creamy way to sneak some extra veggies in their diet, too. With a loaf of crusty French bread, they will demolish crocks of soups and stews like an NFL football team.  I took one of our familiar fall favorites, Creamy Cauliflower Soup (no, for REAL, my boys LOVE this), and looked for a way to make it better. I substituted the cream with Greek Yogurt, and wow! It was a decision that would even impress the goddess of wisdom, Athena.

    I’m excited to have made early resolutions to make some positive changes in my life. I hope that you will try my Creamy Cauliflower Soup as a positive choice and delicious option for you and your family, too! And, Happy (two-months early) New Year! Tracking Pixel

    Creamy Cauliflower Soup
    Author: Momma Chef
    Prep time:
    Cook time:
    Total time:
    Serves: 8
    Ingredients
    • 2 bags cauliflower florets (10-12 oz. bags)
    • ¼ cup olive oil
    • 2 box (32 oz.) vegetable broth
    • 1 chopped onion
    • 2 cups peeled and diced celery root
    • 1 cup Plain Greek Yogurt, 0% or 5% Fat
    Instructions
    1. In a large saucepan, sauté the onion in olive oil over medium heat for 3 minutes.
    2. Add in cauliflower florets and diced celery root, mix and cook another 2 minutes.
    3. Add the vegetable broth.
    4. Cover partially and cook over medium heat for 30 minutes until cauliflower is very tender.
    5. Add in Greek yogurt and puree soup in a blender, food processor or soup emersion until smooth.
    6. You can also make this in the Crock Pot/Slow Cooker follow all steps above and cook on low for 6 hours.

    Quick and Easy Cauliflower Soup

    Like it? Pin it!

    Quick and Easy Cauliflower Soup

  • FESTIVE HOLIDAY CHOCOLATE BARK

    FESTIVE HOLIDAY CHOCOLATE BARK

    This recipe should really be called “Best Last-Minute Dessert” Or maybe “Insert Holiday Here” Bark. or “I Bet You Can Make This Right Now” Chocolate Bark because the odds are you already have on hand what you need to stir up this batch of yumminess. The only must-have ingredient is a partial bag of chocolate chips- that’s it! From there, you are limited only by what’s in your cupboards. If you’re making it on the fly and are woefully lacking traditional toppings, try cereal or the broken ends of the pretzels in the bottom of the family-size bag.

    I especially love to make this chocolate bark in October with some fall-colored M&M’s and candy corn. Crushed candy canes make a wonderful winter treat – you can break it up into pieces and put it on your cookie trays.

    No matter the season, this is one of the first desserts you can make with the littlest of kids. You – of course – will be in charge of melting and spreading the heated chocolate, and they’ll be in charge of dropping in their favorite mix-ins. If you’re like me – multiple kids with multiple palates – you can make smaller pans of chocolate bark, and each one of your little goblins can customize their toppings.

    Make this bark anytime and anyway! I myself am partial to marshmallows and raisins. This recipe also makes a sweet treat for your child to make and take as a gift to a special teacher. You could always tape a coffee card on top, too!

    On top of sharing this fun recipe- I’m excited to be one of Google’s paid early testers for their Thank with Google pilot program. This program is an experimental feature that allows you to purchase a virtual sticker and directly show your appreciation for any Momma Chef recipes that you make! I have always made my recipes “ad-free” so you are able to scroll and quickly get to the recipe, I mean who has time for pages of ads! You can finally express yourself and share what my work means to you by sending me a sticker! And the stickers are just so cute and fun and you get to choose the one you want to send me. Every time you send a paid sticker you can add a personal message that I get to read. And for me, these virtual stickers can translate into direct revenue to support the work and all of my recipe development that goes into the content that you are enjoying on my blog.

    You can find the Thank with Google feature on the bottom of this recipe and in my sidebar. If you test it out let me know what you think! Thanks as always for your support. Happy Holidays!

    Easy Halloween Chocolate Bark

    FESTIVE HOLIDAY CHOCOLATE BARK
    Author: Momma Chef
    Prep time:
    Total time:
    Serves: 6
    Ingredients
    • 1 cup (8-ounces) semi-sweet chocolate chips
    • 20 Candy Corn
    • 1 small bag of M&M’s (I like to use the 1.69-ounce bag)
    Instructions
    1. Spray a small disposable pan (9X13) with Pam.
    2. Pour chocolate chips into a microwave-safe bowl and microwave on high for 1 minute and 30 seconds.
    3. Mix and microwave for another 1 minute until all chocolate is melted.
    4. Spread mixture into the greased pan and drop in Candy corn and M&M’s.
    5. Refrigerate at least 30 minutes until set and then break up the chocolate bark and enjoy! [br]
    Tips:
    1. Some other fun variations are:
    2. Rice Krispies and a pinch of sea salt.
    3. Salted pretzel pieces and mini M&M’s.
    4. Marshmallow and raisins.
    5. A couple of handfuls of crushed candy canes.
    6. The combinations are endless…

    Like It? Pin It! 

  • Oh-So-Good Smoked BBQ Brisket Sliders

    Oh-So-Good Smoked BBQ Brisket Sliders

    Several years ago on a trip to the Smoky Mountains, we had our first smoked brisket sandwich. My husband fell in love with the dish! Since I did not see purchasing a smoker in the near future, I had to figure out an easy way to replicate this brisket. I discovered liquid smoke and after several tries, I finally did it! This has been taste-tested on family and friends and is a huge hit. You will definitely impress with this dish!

    Smoked BBQ Brisket Sliders
    Author: Momma Chef
    Serves: 6-8 sliders
    Prepare to impress with these easy and delicious Smoked BBQ Brisket Sliders. This dish is sure to be a hit with your family and guests.
    Ingredients
    • A first-cut cut brisket, approx. 3 lbs.
    • 1 tbsp. McCormick Grill Mates Applewood Rub
    • 2 tsp. Colgin All Natural Hickory Liquid Smoke
    • ½ cup Wishbone Light Italian dressing
    • 1 cup Sweet Baby Ray’s BBQ sauce
    • ½ bottle beer (any brand)
    Instructions
    1. Place brisket in slow cooker.
    2. Rub with Grill Mates Applewood Rub, then pour Liquid Smoke, Italian dressing, BBQ sauce and beer over the brisket.
    3. Cover and cook on low for 8 hours.
    4. Once finished, take two forks and shred the beef.
    5. Serve on Hawaiian rolls or brioche rolls.[br]
    Tips:
    1. You can top the brisket off with your favorite slice of cheese or coleslaw.
    2. This can be made the day before and reheated in a pan until warm.
    3. Make sure the rolls are fresh!

    Like this recipe? Pin it!


  • Dairy-Free Vanilla Pudding

    Quick and Easy Dairy-Free Pudding

    Who doesn’t love a trifle? It’s literally one of my favorite desserts. My kids happen to love strawberry shortcake, I mean that can’t really be a dessert since it has real strawberries in it — right? So, I thought it would be so fun to try to create a strawberry shortcake trifle. 

    I wanted to come up with a recipe for a dairy-free version, which proved to be more difficult than I anticipated. My first step was figuring out how to make dairy-free pudding. I tried looking up a bunch of recipes, but they all seemed to be way too complicated with too many ingredients. 

    So, I did a little research, ran to the store to buy a variety of dairy-free vanilla pudding mixes (easy option) and different kinds of dairy-free milk. I tried out a couple of variations; some were too liquidity and some looked clumpy (although still tasted great); the recipe below turned out the best. You honestly can not tell this pudding is dairy-free! It is a similar recipe to the one on this box (I also liked this brand the most) but I tweaked the ingredients and amounts to make it non-dairy and still have a good consistency. 

    Stay tuned for the full trifle recipe next week (might not be “6 under 6”). In the meantime, I hope you enjoy this dairy-free pudding recipe.

    Dairy-Free Vanilla Pudding
     
    Author: Momma Chef
    Prep time:
    Cook time:
    Total time:
    Serves: 3 small bowls
    Ingredients
    • 1 3-4 oz. box of non-dairy Vanilla Pudding Mix
    • 1 1/2 cups plain almond milk (no flavor)
    • 1 egg yolk
    Instructions
    1. In a small saucepan whisk together almond milk, pudding mix and egg yolk *try not to get in any egg white.
    2. Cook over low/medium heat whisking constantly until it comes to a boil (about 3 minutes).
    3. Once the mixture has come to a boil, let it cook until the mixture thickens, keep whisking (about 2 minutes).
    4. Remove from the heat and pour it into 2 or 3 small bowls.
    5. Eat immediately or refrigerate. Enjoy!
     
    Like it? Pin it! 

    Quick and Easy Pudding Recipe


  • Finger Lickin’ Good 3-Ingredient Beef Ribs

    Finger Lickin’ Good 3-Ingredient Beef Ribs

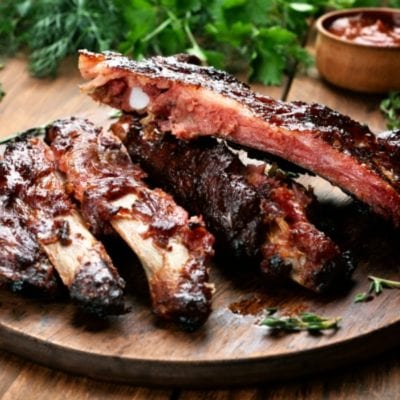
    Easy and Delicious 3 Ingredient Baked Ribs

    My husband absolutely loves beef ribs, he thinks of them as a special treat, and I am hoping he never sees this post to learn my secret of how easy they are to make! This truly is a “Finger-Lickin’ Good” recipe.

    I make these three-ingredient barbecue beef ribs as appetizers for special dinner parties I host or a special dinner treat. They are so incredibly easy and always come out delicious. After you make these once, you will see why they are always the hit of the party. Enjoy!

    Finger Lickin’ Good 3-Ingredient Beef Ribs
    Author: Momma Chef
    Prep time:
    Cook time:
    Total time:
    Serves: 5 servings
    Ingredients
    • Rack of beef ribs (about 4 pounds)
    • 2 tablespoons soy sauce
    • 1 cup of your favorite barbeque sauce
    Instructions
    1. Preheat oven to 325 degrees.
    2. Brush the soy sauce over both sides of the ribs.
    3. Add 1/2 cup water to the bottom of a small pan (I like to use a disposable pan).
    4. Place ribs over water, brush ½ cup barbecue sauce over the top of the ribs and bake 2 hours, covered tightly.
    5. Remove from the oven, uncover and drain the liquid from the pan.
    6. Brush the ribs with remaining ½ cup barbecue sauce and bake uncovered another 20 minutes. Serve immediately.
    7. *you can also make these in the crockpot/slow cooker. Place your ribs on the bottom of the slow cooker, pour 1/2 cup water over the ribs, brush them with soy sauce and then pour 3/4 cup barbeque sauce over the ribs. Bake on high for 3 hours then transfer ribs to an oven tray, add the remaining 1/4 cup barbeque sauce on the ribs and broil for 5-10 minutes until the top is bubbling.

    Like it? Pin it!

    Easy and Delicious 3 Ingredient Baked Ribs

  • SB&J Sushi Rolls

    SB&J Sushi Rolls

    Li

     Are you looking for a fun and simple recipe to make for your kids’ lunches? Look no further. Momma Chef’s SB&J Sushi Rolls have become such a favorite at my son’s school that one of the teachers sought me out at our last parent/teacher conference to thank me for the idea. She wanted to let me know that she made them for her daughter’s birthday party, and they were a huge hit. I love it!

    And what’s not to love about SB&J Sushi Rolls?

    To begin with, they are pretty darn cute. Who can resist a sweet little lunch roll-up? How fun it will be for your child to open her lunch bag and find “sushi rolls” instead of the expected, traditional sandwich.

    Plus, sushi is super mainstream to the hip elementary school crowd. I’ve seen sushi t-shirts, stuffed animals, and memes aplenty. My friend’s five-year old daughter’s favorite toy is her Melissa and Doug sushi slicing wooden play set. Super adorable! One of the Littlest Pet Shop cats comes with teeny-tiny plastic sushi. Seriously. SB&J Sushi Rolls are going to rock your kids’ cafeteria tablemates.

    Next, they are SO EASY to prepare. Are they as easy as a sandwich? Of course not – but just about. This recipe can be easily completed under five minutes – including making an extra serving for yourself to nosh on after the kids head to school.

    Finally, they are made with SunButter instead of peanut butter. If you aren’t familiar with SunButter, let me fill you in on this great product. It is made from sunflower seeds, and it is absolutely nut-free. While I am fortunate that my own kids do not have nut allergies, many of their friends at school do.  Out of respect for those families, I like to promote yummy lunch recipes that respect their dietary restrictions. And SB&J Sushi Rolls perfectly fits the bill.

    For some added pizzazz, pick up some extra sets of disposable chopsticks from your favorite Asian restaurant.  Include a pair for your kids to have authentic tableware as they enjoy this creative lunchtime offering.

    SB&J Sushi Rolls
    Author: Momma Chef
    Prep time:
    Total time:
    Serves: 6 Sushi Rolls
    Ingredients
    • 2 slices of your favorite Wheat Bread
    • 2 teaspoons creamy SunButter
    • 2 teaspoon strawberry or grape jelly (pick your favorite)
    Instructions
    1. Remove crusts from bread. Use a rolling pin to flatten two slices of bread.
    2. Spread 1 teaspoon of SunButter to within 1/2-inch of edges.
    3. Top SunButter with 1 teaspoon of strawberry or grape jelly.
    4. Roll up each slice of bread into a tight spiral.
    5. Refrigerate 15 minutes (optional)
    6. Cut into 2” pieces and serve.
    7. Voilà: the perfect lunch or afternoon snack!

    Like it? Post it!

    Sunbutter and Jelly Sushi Roll