Blog

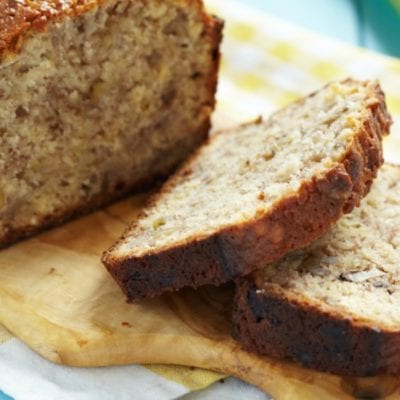
  • Simple and Delicious Matzo-Free Passover Muffins

    Simple and Delicious Matzo-Free Passover Muffins

    Quick and Delicious Passover Muffins

    For those celebrating Passover- we know the week consists of matzo, matzo, and even more matzo. I couldn’t handle how much sugared “cereal”, yogurt, and chocolate smeared matzo my kids were consuming in the mornings. I did try the Passover pancakes, but my two boys asked me if I had just made them mashed potatoes in a circle (in their defense- the first ingredient was potatoes).

    My kids love my “Super Easy and Kid Approved Muffins” (link to this recipe below) but we do not eat these on Passover, so my challenge was set- Kid Approved Passover Muffins. These were so much easier to create than I had anticipated!

    I picked up some Coconut and Tapioca flour (the grocery store was out of Almond flour which would have been my preferred flour substitute) and just swapped these flours in place of whole wheat flour. My kids were so excited when these came out of the oven, I even got a big “thank you” from my middle son! I did have to add some extra baking soda and eggs since these flours do not rise like white or whole wheat flour. 

    Oh- did I mention these muffins are gluten-free as well! Let me know if your family loves these as much as mine!

    Simple and Delicious Matzo-Free Passover Muffins
    Author: Momma Chef
    Prep time:
    Cook time:
    Total time:
    Serves: 12-14 muffins
    Ingredients
    • 1 ½ c. almond, coconut or tapioca flour (or any combination of these 3 to equal 1 1/2 cups)
    • 3 overripe bananas
    • ½ c. honey
    • 2 tsp. baking soda
    • 3 large eggs
    • ⅓ c. vegetable oil
    Instructions
    1. In a large mixing bowl, add all six ingredients above and blend with a hand mixer for three minutes.
    2. Fill greased or paper-lined muffin cups half full.
    3. Bake at 375° for 17-19 minutes or until a toothpick inserted near the center comes out clean.[br]
    Tips and Tricks:
    1. You can add ½ cup chocolate chips (my kids prefer semi-sweet).
    2. The muffins will stay fresh in an airtight container or Ziplock bag for two days. After that, put them in the refrigerator.
    3. If refrigerated, put the muffins in the microwave for 20 seconds to warm before serving.
    4. I use muffin cups, which makes it more fun for the kids. If you use them, spray them with cooking spray before filling.
    Click here for my original Super Easy and Kid-Approved Yummy Banana Muffins!

    Quick and Delicious Passover Muffins


    Like it? Pin it!

    Quick and Delicious Passover Muffins

  • Delicious and Simple 3 Ingredient Meatballs

    Delicious and Simple 3 Ingredient Meatballs

    Quick and Easy 3 Ingredient Meatball Recipe

    A friend was spending time with a family member in the hospital, and I offered to cook dinner for her family. Somehow in the midst of a busy day, I had completely forgotten about preparing the meal. When my friend called to see if I was still planning to drop off the food in 45 minutes, I said “Of course!” This is the meatball recipe I created on the fly. I happened to have some garlic bread in the freezer, which I popped into the oven. I threw together a salad while the meatballs were cooking. In less than 40 minutes, I made an entire meal for a family of five! As a bonus, my friend called later that night to say how much her kids loved the meatballs. To this day, she has no idea that I had actually forgotten about making the meal. Well . . . up until this day.

    Delicious and Simple 3 Ingredient Meatballs
    Author: Momma Chef
    Prep time:
    Cook time:
    Total time:
    Serves: 20 meatballs
    Ingredients
    • 1 1/2 pounds extra-lean ground beef
    • 1 20 oz jar tomato basil past sauce
    • 2 tbsp. olive oil
    • 1 tsp. salt
    Instructions
    1. Heat a skillet or pan over medium-high heat.
    2. Add oil; swirl to coat.
    3. Shape 20 meatballs (about 2 tablespoons each) and place in the olive oil.
    4. Sprinkle with salt.
    5. Sauté meatballs 3 minutes on each side then add pasta sauce over meatballs.
    6. Cover with a lid or tinfoil and cook for 15 minutes.
    7. Serve over rice or pasta. [br]
    Tips:
    1. You can substitute ground turkey or ground chicken.
    2. Alternatively, this can be made in the Crock-Pot on low for 6 hours.

    Like it? Pin it!

    Quick and Easy 3 Ingredient Meatballs

  • Easy and Delicious Mongolian Beef

    Easy and Delicious Mongolian Beef

    Quick and Easy Mongolian Beef

    You know those meals when you spend hours in the kitchen and once the food is ready, you don’t even feel like eating the meal? Yes- it happens to all of us! Well- this is NOT one of those recipes! This entire dish is devoured within five minutes of being served.

    This is a simple take on the classic Mongolian Beef dish which is one of my kids’ favorite Chinese dishes. They were ecstatic when I started making it at home. It is such an easy dish and I love how tender the beef is when finished cooking. I keep it very mild for my family but you can add 1/4 tsp dried chili peppers to kick up the heat. I This dish goes great with Trader Joe’s frozen brown rice and steamed broccoli. I hope you enjoy as much as my family does!

    Easy and Delicious Mongolian Beef
    Author: Momma Chef
    Prep time:
    Cook time:
    Total time:
    Serves: 4
    Ingredients
    • 1 pound flank steak or London broil–thinly sliced
    • ¼ cup Soy Vey Veri Teriyaki Marinade
    • 2 tbsp. hoisin sauce
    • 3 scallions sliced into 1-inch pieces
    • 1 tsp ground ginger
    • 1 tbsp sesame oil
    Instructions
    1. Pour Soy Vey, hoisin sauce and ground ginger into a gallon size Ziplock bag. Seal the bag and shake all ingredient to mix.
    2. Add beef and scallions, seal the bag again, and shake one more time to coat the beef.
    3. Marinate several hours or overnight.
    4. When ready to cook, heat up wok or large frying pan over medium-high heat and add sesame oil.
    5. Pour all ingredient from Ziplock bag into wok/pan and stir-fry over medium-high heat for 5-7 minutes. Mixing as it cooks until the sauce is thick and coats the beef and scallions.
    6. Alternatively, you can cook this in a Crock-Pot, just add all ingredients from the Ziplock to Crock-Pot and cook on high for 3 hours.[br]
    Tips
    1. If you do not have time to let this marinate- I made this dish tonight with only marinating 30 minutes and it will still delish!
    2. I like to double the recipe if I am making it for a family of 5+.
    3. I order my steak in advance and have the butcher slice it thin, saves a step.


    Like it? Pin it!

    Quick and Easy Mongolian Beef


  • Easiest Miso Glazed Cod

    Easiest Miso Glazed Cod

    Quick and Easy Miso Glazed Cod

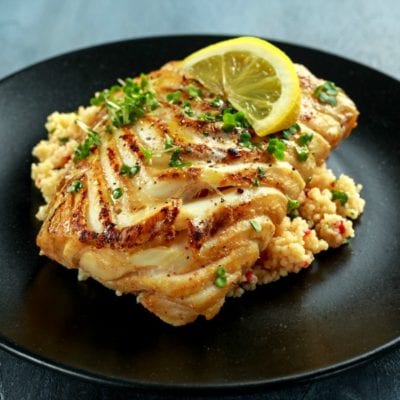
    No one will even know this recipe took you 5 minutes to throw together – it’s just that good! This has to be one of the easiest cod dishes you are ever going to make! You absolutely cannot mess this up, just don’t overcook it. This will be an instant hit with your family and friends. I am all about presentation, so I like to plate it over a couscous or Japanese rice. You can check out my recipe for Garlic-Infused Rice which will go great with this Miso Glazed Cod recipe. Enjoy!

    Miso Glazed Cod
    Author: Momma Chef
    Prep time:
    Cook time:
    Total time:
    Serves: 4
    Ingredients
    • 4 black cod or regular cod fillets
    • 1/4 cup miso paste
    • 1/3 cup cooking mirin
    • 1/4 cup cooking sake
    • 3 tbsp brown sugar
    Instructions
    1. Preheat broiler (set your oven to “broil”).
    2. For the marinade: In a microwave-safe bowl, mix together miso paste, mirin, sake and brown sugar.
    3. Cook marinade in the microwave for 2 minutes until most of the sugar is dissolved and mix to combine the ingredients.
    4. Add the cod to the bowl and rub marinade over both sides, if possible let the cod sit in the marinade between 5-30 minutes (preferably closer to 30 minutes).
    5. Place cod fillets on a sheet pan lined with foil and roast the cod fillets in the oven for 8- 9 minutes until fillets are fork tender and caramelized.

    Like It? Pin it!

    Quick and Easy Miso Glazed Cod


  • Jordan’s Simple and Delicious Vegetarian Enchiladas

    Jordan’s Simple and Delicious Vegetarian Enchiladas

    Simple and Delicious Vegetarian Enchiladas

    When my friend called to ask if I would like to try a delicious recipe that would be perfect for Momma Chef’s “6 under 6”, I most definitely said, YES! Especially since this friend, Jordan, is an amazing cook. I knew this would be a recipe I wanted to get online ASAP. When I asked him if he had taken any photos, he explained that he wasn’t able to get any since his wife and daughters finished the entire dish. Within one week of getting this recipe: I tried it, fed it to my family and it is coming to all of you! This is a vegetarian version, but you can absolutely add some shredded chicken or ground beef to the black bean mixture, I would add 1/2 cup of chicken or beef. Thanks for this recipe, Jordan! Show him some love – if you make it, please comment below. Enjoy!

    Jordan’s Simple and Delicious Vegetarian Enchiladas
    Author: Momma Chef
    Prep time:
    Cook time:
    Total time:
    Serves: 6 Enchiladas
    Ingredients
    • 6 medium size tortillas
    • 1-15 oz.can of black beans, drained
    • 1- 4 oz. can of chopped chilies, drained
    • 1/2 packet of taco seasoning
    • 3/4 cup shredded cheddar or jack cheese
    • 1/2 jar salsa
    Instructions
    1. In a small pan over low heat, warm black beans, chilies and taco seasoning together for 3 minutes.
    2. While this is warming, take 1/3 cup salsa and spread on the bottom of an 8×8 or 10×12 pyrex.
    3. Spoon black bean mixture into the tortillas, fold and put in the pyrex (seam-side down or on the side)
    4. Repeat for the remainder of the tortillas.
    5. Spoon another 1/3 cup of salsa on top of the rolled tortillas and then put a layer of cheese on top
    6. Broil for 5-7 minutes (keep an eye on this).[br]
    Tips:
    1. If serving for company, I like to sprinkle with some chopped herbs right before serving.
    2. This goes great with some sour cream and extra salsa.
    Like it? Pin it!

    Simple and Delicious Vegetarian Enchiladas

  • Delicious Banana Liqueur Muffins

    Delicious Banana Liqueur Muffins

    Quick and Easy Banana Liqueur Muffins

    Before I share what has become my favorite muffin recipe, I have a very important confession: this recipe has seven ingredients. Yes, I can almost hear the gasps from all of you Momma Chef followers because I know it does not technically fit my “6 Under 6” rule for all recipes.

    I tried very hard to get this recipe down to six ingredients, but I couldn’t. On the almost one-year anniversary of launching Momma Chef, I am making an exception for one extra ingredient. But don’t fret. These muffins are a one-bowl recipe that you can whip up in under five minutes prep time!

    My friend was having a celebration at her house, and I offered to bake something for her out-of-town guests. She requested my banana muffins. While I love my 6-ingredient banana muffin recipe, I wanted to surprise her with something new and unique for this special occasion. Adding chocolate chips or chocolate frosting — or both — had been done. Then it hit me — how about adding banana liqueur to the muffin recipe?

    All I could say when these came out of the oven was WOW! They were absolutely, positively delicious! You cannot taste the liquor, but it added such a unique flavor and gave the muffins a very moist texture. And before you ask — YES, they are kid-friendly. By using only three tablespoons of banana liquor for 35 mini muffins, most of the liquor will burn off during baking. What’s left is the added flavor. Your kids will not feel the effect of the liquor, although after watching my three boys devour about five mini muffins each I was secretly hoping I would hear the words every parent longs for on a weekend day: “Mommy, I’m tired.” Nope didn’t happen!

    If you’re making these as mini muffins, be careful when baking. They cook quickly, and you’ll need to get them out of the oven before they burn. Start checking with a toothpick at the 8-minute mark. You can also add semi-sweet chocolate chips to these muffins. But that would make it eight indigents! My kids would tell you to make another exception since they love anything with a little added chocolate.

    Happy baking!

    Delicious Banana Liqueur Muffins
    Author: Momma Chef
    Prep time:
    Cook time:
    Total time:
    Serves: 35 mini muffins
    Ingredients
    • 1 ½ c. whole wheat flour
    • 3 overripe bananas
    • 3 tablespoons Banana Liqueur
    • ½ c. honey
    • 1 tsp. baking soda
    • 2 large eggs
    • ⅓ c. avocado oil
    Instructions
    1. In a large mixing bowl, add all seven ingredients above and blend with a hand mixer for three minutes.
    2. Fill greased or paper-lined mini-muffin cups 3/4 full.
    3. Bake at 375° for 8-10 minutes or until a toothpick inserted near the center comes out clean.[br]
    Tips:
    1. If these are only going to be eating by adults (no kids) you can increase the Banana Liqueur to 1/2 cup and decrease the oil to 1/4 cup. They are even more scrumptious this way!
    2. You can add ½ cup chocolate chips (my kids prefer semi-sweet).
    3. The muffins will stay fresh in an airtight container or Ziploc bag for two days. After that, put them in the refrigerator.
    4. If refrigerated, put the muffins in the microwave for 10 seconds to warm before serving.

    Quick and Easy Delicious Banana Liqueur Muffins

    Like it? Pin it!

    Quick and Easy Delicious Banana Liqueur Muffins

  • Country “Fried” Chicken Recipe

    Country “Fried” Chicken Recipe

    This is going to be one of the easiest and tastiest chicken dishes you’ve ever made! The flavor is delicious, and the light coat of mayonnaise gives the outside a crispy texture that resembles fried chicken but is much healthier. My whole family loves this dish. Enjoy!

    Country “Fried” Chicken Recipe
    Author: Momma Chef
    Prep time:
    Cook time:
    Total time:
    Serves: 8
    Ingredients
    • 8 bone-In chicken breasts with skin
    • 1/2 teaspoon Lawry’s Seasoning Salt
    • 1 cup low fat mayonnaise
    • ¼ cup olive oil
    Instructions
    1. Preheat oven to 400 degrees F.
    2. Rub olive oil over skin of the chicken and sprinkle with Lawry’s Seasoning Salt then spread the mayonnaise on top of the seasoning.
    3. Bake for 1 hour uncovered on lower rack.[br]
    Tips and Tricks:
    1. If you like dark meat you can substitute with bone-In thighs.
    2. I like to use disposable gloves when preparing chicken. Check out Momma Chef’s “Poultry Tips”

    quick and easy country fried chicken recipe

  • Easiest (and Best) Old-Fashioned Brisket Recipe

    Easiest (and Best) Old-Fashioned Brisket Recipe

    I’ll never forget the first time I enjoyed this marvelous and mouth-watering dish. I was pregnant with my first. It was a holiday, and my aunt Gloria made brisket for our family party. The brisket was a hit – particularly with my cousin Amy who was 9.5(!!) months pregnant and with me, who was 4 months along

    The following morning, I woke up c-r-a-v-i-n-g the brisket for breakfast. Fortunately, my aunt had made so much of it that I knew there were plenty of leftovers in the refrigerator. My mouth was watering, and my baby was kicking in anticipation of enjoying another round of the ambrosial brisket. Needless to say, this little momma was none too happy to find out that my husband and my cousin Joey had scarfed down the entire two pounds during a 4 A.M. “snack” during a marathon video gaming session! So, yeah – that was 17 years ago, and I’ve almost forgiven them.

    In any case, I adopted this amazing recipe, making a few minor changes throughout the years that made it a bit easier to fit into my busy lifestyle. Are you surprised that her secret ingredient is a can of Coca-Cola? The sugar in the soda will tenderize the meat and add a wonderful sweetness; and before you ask, for those reasons, do not use Diet Coke.

    While the brisket may take a couple hours to cook, you will only spend 5 minutes getting it in the oven or slow cooker, and then you can step away and enjoy the tantalizing aromas coming from your kitchen. Brace yourself for a life-changing brisket. It’s the best of the best.

    Consider yourself warned: hide the leftovers!

    Easiest (and Best) Old-Fashioned Brisket Recipe
    Author: Momma Chef
    Prep time:
    Cook time:
    Total time:
    Serves: 6-8
    Prepare to impress with this easy and delicious brisket recipe. A family favorite!
    Ingredients
    • 1 (3- to 4) pound beef brisket
    • 1 (1-ounce) envelope onion soup mix (my favorite is Lipton Onion Soup Mix)
    • 1 (12-ounce) bottle Heinz Chili Sauce
    • 2 cups ketchup
    • 1 (8-ounce) package of sliced mushrooms, optional
    • 1 (8-ounce) can of Coca-Cola
    Instructions
    1. Preheat the oven to 300°F.
    2. Place the brisket in a disposable pan or slower cooker.
    3. Sprinkle the onion soup mix over the brisket, and top with the chili sauce and ketchup.
    4. Add the mushrooms, if using, pour the Coca-Cola over everything, and add 1⁄2 cup of water.
    5. Bake the brisket covered in the oven for 4 hours at 300°F or in the slow cooker on low for 6 hours, until the meat is very tender.
    6. Remove the brisket from the oven or slow cooker, and let the brisket come to room temperature before slicing. This takes about 30 minutes.
    7. Cut the brisket against the grain before serving. [br]
    Tips:
    1. Keep fat on the brisket to flavor while cooking and trim off when finished and slicing.
    2. Make sure to cut against the grain, the butcher will show this to you (tip for all beef).
    3. Do not use Diet Coke..only regular Coke.
    4. If you want extra sauce for gravy, you can add ½ cup water after 2 hours of cooking to the bottom of the pan.

  • Easiest 1-Bowl Homemade Mac and Cheese

    Easiest 1-Bowl Homemade Mac and Cheese

    Easiest 1-Bowl Mac and Cheese

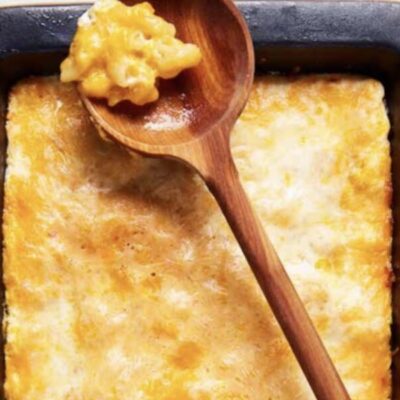
    I will let you in on a Momma Chef secret- when my kids were younger, they ate boxed mac and cheese, more than I would like to admit. I made sure to buy the all-natural, organic brands, as not feel too guilty, but I knew there had to be an easy way to make homemade mac and cheese. What I really wanted was to be able to throw it all together, without needing to use an extra pot to boil the noodles, just a 1-bowl dish. It definitely took a while to master this recipe, but I finally got a big thumbs up from boys! This is so unbelievably easy, you don’t even need to boil the noodles first, it makes the boxed mac and cheese look difficult! Hope your kids love this as much as mine do!

    Easiest Homemade Mac and Cheese
    Author: Momma Chef
    Prep time:
    Cook time:
    Total time:
    Serves: 8
    Ingredients
    • 2 Cups elbow macaroni, regular or gluten-free
    • 4 cups 2% or Whole Milk
    • 1 tsp. salt
    • 3 tbsp. salted butter, melted
    • 5 cups shredded cheese (I like using a mixture of Sharp Cheddar and Mexican Blend)
    Instructions
    1. Add macaroni, milk, salt, melted butter and 3 cups of shredded cheese into a large bowl and mix well.
    2. Pour into a 9-by-13-inch greased baking dish.
    3. Sprinkle remaining 2 cups of cheese over mixture and cover with foil.
    4. Bake covered at 350 degrees for 35 minutes then remove foil and bake an additional 20 minutes uncovered.


    Like it? Pin It!

    Quick and Easy No-Boil Mac and Cheese

  • GRILLED LAMB CHOPS WITH MUSTARD RUB

    GRILLED LAMB CHOPS WITH MUSTARD RUB

    GRILLED LAMB CHOPS WITH MUSTARD RUB

    Grilled lamb chops with mustard rub? So elegant and so easy! This recipe is one of
    my husband’s absolute favorites. My sons love it, too! In fact, I’ve been doubling the recipe ever since my oldest entered adolescence and his never-ending appetite kicked in. Before long, I’ll be tripling it.

    When you make this recipe, you’ll be following in the footsteps of the iconic Julia Child and her leg of lamb recipe, Gigot à la Moutarde. Sounds très fancy, right? Here’s a secret—Julia used soy sauce in her marinade. She knew it was just the kick needed to elevate this dish from bien to fantastique! I love to serve this recipe to welcome spring. Brush the March snow off your grill, and bon appétit!

    Best-Ever Grilled Lamb Chops
    Author: Momma Chef
    Prep time:
    Cook time:
    Total time:
    Serves: 8 lamb chops
    Ingredients
    • 2 tablespoons (30 ml) Dijon mustard
    • 2 garlic cloves, minced
    • 1⁄4 cup (60 ml) soy sauce
    • 8 lamb chops (2 to 21⁄2 pounds)
    Instructions
    1. In a gallon-sized zip-top bag, combine the Dijon mustard, garlic and soy sauce.
    2. Seal the bag, and shake to mix the ingredients.
    3. Add the lamb chops to the bag, and shake again to coat the lamb chops.
    4. Marinate the lamb chops for several hours or up to overnight in the refrigerator.
    5. When you’re ready to grill, preheat the grill to medium heat.
    6. Remove the lamb chops from the marinade, and grill for 2 to 3 minutes on each side.

    Like it? Pin it!

    Quick and Easy 4 Ingredient Lamb Chop

  • Balsamic Glazed Roasted Brussel Sprouts

    Balsamic Glazed Roasted Brussel Sprouts

    This is going to be one of the easiest and tastiest Brussels sprout dishes you’ve ever made! But, buyer beware, if you have not made Brussels sprout before, there can be a strong smell that takes some getting used to, it’s worth it for us since my whole family loves this side dish. Enjoy!

    Balsamic Glazed Roasted Brussels Sprouts
    Author: Momma Chef
    Prep time:
    Cook time:
    Total time:
    Serves: 6
    Ingredients
    • 1 1/2 lbs Brussels sprouts
    • 2 tbsp olive oil
    • 1 tsp kosher salt
    • 2 cloves garlic chopped
    • 1 tbsp balsamic vinegar or glaze
    Instructions
    1. Preheat oven to 425°F.
    2. Line a baking sheet with aluminum foil.
    3. Cut off the bottoms off the sprouts and slice sprouts in half lengthwise.
    4. In ziplock bag, toss Brussels sprouts, oil, salt and garlic, shake to coat.
    5. Transfer the Brussels sprouts to baking sheet and roast until tender, about 20 minutes.
    6. Place cooked sprouts on serving dish and drizzle with balsamic vinegar or glaze.

    Like it? Pin it!

    Quick and Easy Balsamic Brussels Sprouts

  • Healthy Baked Mozzarella Sticks

    Healthy Baked Mozzarella Sticks

    Quick and Easy Healthy Baked Mozzarella Sticks Recipe

    It’s cold here in Chicagoland.  In mid-January, the temps are plummeting, the wind is howling, and the snow is blowing —only the brave want to venture outside. For my family, the onset of winter weather ups our craving for comfort food. The juicy and refreshing fruit that we relished in June has been replaced by our need for ooey, gooey deliciousness. Cue the mozzarella sticks. My boys’ eyes light up when they come in from the cold and find a tray waiting for them, hot out of the oven. And now that my boys are older, the recipe is easy enough that they can make a second tray on their own! It’s a perfect after-school snack – filled with protein, calcium, and cheese-y goodness. If you wish, you can use a low-fat mozzarella stick to cut the calories.

    Healthy Baked Mozzarella Sticks
    Author: Momma Chef
    Prep time:
    Cook time:
    Total time:
    Serves: 16 pieces
    Ingredients
    • 8 sticks String Cheese
    • 1/2 cup Italian seasoned breadcrumbs (you can also use GF Panko)
    • 1 egg, beaten
    • 1 tablespoon milk
    Instructions
    1. Cut string cheese in half to give you 16 pieces and place in the freezer until cheese is frozen, at least 30 minutes.
    2. When ready to bake, preheat oven to 400° F.
    3. In a large bowl, mix together eggs and milk. Set aside.
    4. In a large Ziploc bag, add the breadcrumbs and salt.
    5. Dip each string cheese in the egg/milk mixture and put them in the Ziploc bag. Shake to coat all sides of the cheese.
    6. Line a baking sheet with aluminum foil and lightly spray with cooking spray. Arrange the cheese in a single layer on the baking sheet and bake for 7 minutes.[br]
    Tips:
    1. These need to be baked when the cheese is frozen, or you will have messy blob of cheese (which did happen to me when I was trying these out, and I have to admit, these still did taste great). If they are not still frozen when ready to bake, just simply return the breaded cheese to the freezer for 20 minutes then bake immediately.
    2. My kids like dipping these in marinara sauce.
    3. This a great activity to make with your kids.

    Like it? Pin it!

    Quick and Easy Healthy Baked Mozzarella Sticks Recipe


    Quick and Easy Healthy Baked Mozzarella Sticks