Blog

  • Etta’s Simply Delicious Roasted Potatoes

    Etta’s Simply Delicious Roasted Potatoes

    Simply Delicious Roasted Potatoes

    You know I love to find or create good recipes. You may also know that I love to find and celebrate good people. Today I want to share a recipe with you that has both: it’s an amazing and simple recipe that came from an amazing and special person who recently passed.

    Etta shared this recipe with me a few years ago, and I have made it at least a hundred times since. I know you will enjoy sharing it with your friends and family as well. Like all of Momma Chef creations, it’s quick, easy, and scrumptious — with only three ingredients, you can get this in the oven in under 5 minutes.

    I first met Etta in the spring of 2000. My boyfriend – now husband – and I were newly dating, and in that wonderful but horribly awkward period of meeting each other’s friends and family. I remember how nervous my 23-year old self was, heading to dinner to meet my future sister-in-law, her husband and his extended family for the very first time. Lucky for me, Etta was the hostess that night. As I rang her doorbell, my heart was palpitating knowing that the prime attraction for the dinner menu would be checking out Izzy’s new girlfriend (that was ME!). However, from the moment Etta opened her door, she made me feel comfortable, calming my anxiety with her warmth and charm. Even though she wasn’t even related to my husband (she was family to his brother-in-law), she made me feel like she was on my side. Etta was one of those rare people who open their heart when they open their home.

    Since that fateful April day so many years ago, little did I know how many more times I would be blessed to spend time with Etta. Our families have truly become intertwined: her daughter is one of my closer-than-a-sister friends, her grandchildren are my boys’ best and closest friends, calling each other “cousins,” and her son and my husband are great friends. We have spent countless family dinners, holidays, and vacations together. And no matter where we were, or what we were doing, Etta always pulled me aside and looked in my eyes, smiled, and said, “You know, Karen, you guys are family to us.”

    Knowing my love of cooking and hosting, Etta gave me the most thoughtful gifts: beautiful serving pieces that I adore. I treasure them all the more now, as they help me remember her kind and generous spirit.

    At the funeral, her family and friends spoke of her love, her care, her warmth, and her unwavering dedication to her family. I remembered how she had this special charisma that made you want to seek out her opinions again and again. How unfair that she would be taken from this life so soon. Etta’s family – whether by DNA or by friendship – will continue to share her boundless love and the memory of a life well-lived with others.

    Knowing Etta is one of the most cherished gifts that I received from marrying my husband.

    Etta’s Simply Delicious Roasted Potatoes
    Author: Momma Chef
    Prep time:
    Cook time:
    Total time:
    Serves: 6
    Ingredients
    • 3 pounds baby yellow, baby red or baby purple potatoes
    • 1/4 cup olive oil
    • 3 tablespoons onion soup mix
    Instructions
    1. Preheat oven to 400 degrees F.
    2. Cut the potatoes in half or quarters.
    3. Pour olive oil, onion soup mix and potatoes into a gallon size Ziploc bag. Seal the bag and shake all ingredient to mix.
    4. Spread potatoes on a foil-lined baking sheet or large disposable pan.
    5. Roast in the oven for 25 minutes until brown.
    6. Flip potatoes once while baking to ensure even cooking.
    Like it? Pin it!

    Simply Delicious Roasted Potatoes


  • Grab-and-Go Keto Breakfast Egg Muffins

    Grab-and-Go Keto Breakfast Egg Muffins

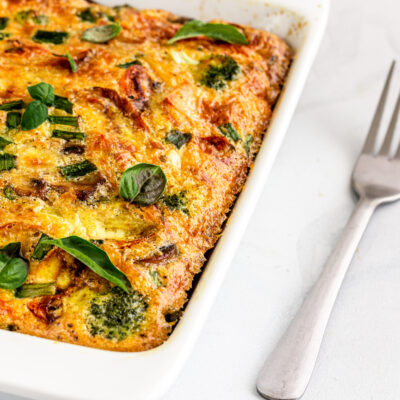
    Mornings + kids = chaos. Here’s a simple way to help start your day happier and healthier. Whip up a batch of these savory muffins on Sunday night, and you’ll have a week of easy breakfasts as you and your kids scramble (get it?) for the school bus. These lifesavers last several days in the refrigerator. Just heat them in the microwave for 25 seconds, and you’re Parent of the Year. Another bonus? You can customize them with your leftovers. Add any cheese, veggies and meat you have in your refrigerator. My boys are big fans of broccoli and Cheddar cheese. Bonus- this recipe is keto-friendly.

    Grab-and-Go Keto Breakfast Egg Muffins
    Author: Momma Chef
    Prep time:
    Cook time:
    Total time:
    Serves: 12 muffins
    Ingredients
    • 6 eggs slightly beaten
    • 2 tbsp milk
    • 1/2 tsp kosher salt
    • 1/2 cup chopped veggies, such as broccoli or spinach
    • 1/4 cup shredded cheese, such as sharp cheddar
    Instructions
    1. Preheat the oven to 375°F.
    2. Coat a standard 12-cup muffin pan with cooking spray.
    3. In a medium bowl, lightly beat together the eggs, milk and salt, and set aside.
    4. Divide the vegetables and cheese among the muffin cups.
    5. Pour the egg mixture into each muffin cup over the vegetables and cheese, filling each one about three-quarters full.
    6. Bake uncovered until golden brown and cooked through about 20 minutes.[br]
    Tips:
    1. The vegetables do not need to be cooked before adding them to the muffin pan. The only exception is onions; if you are going to be using these, I would suggest sautéing them for 3 minutes before adding them to the recipe.
    2. Try adding some fresh herbs, such as freshly chopped basil or dill.
    3. If you have picky breakfast eaters, let them choose the veggies and cheese, and have them put the ingredients in the muffin cup. It’s an easy and fun way for kids to “cook!” Plus, kids are excited to try the foods that they cook themselves.


    Like it? Pin It!

    Quick and Easy Breakfast Egg Muffins


  • Simple Turmeric-Roasted Cauliflower

    Simple Turmeric-Roasted Cauliflower

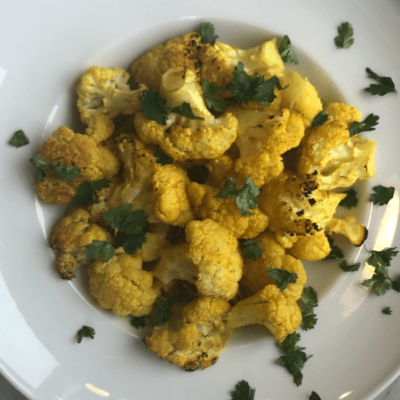
    If you’ve never been a cauliflower fan, then you have not tried this recipe. Roasting this underappreciated vegetable transforms it from “meh” to marvelous. Adding turmeric elevates this dish to the next level. Its vibrant color changes the typically pale presentation of cauliflower into gorgeous golden-hued eye candy. Turmeric is more than just good looks, though. You won’t want to miss out on the antioxidant and anti-inflammatory properties of this wonder spice. Call me shallow, though, because I totally forget all the wholesome perks of turmeric when I see how gosh-darn pretty this prepared recipe looks on my table.

    Simple Turmeric-Roasted Cauliflower
    Author: Momma Chef
    Prep time:
    Cook time:
    Total time:
    Serves: 8
    Ingredients
    • 2 lb. bag cauliflower florets
    • 1/3 cup olive oil
    • 2 tbsp lemon juice
    • 1 tbsp sugar
    • 1 tsp salt
    • 1 tsp turmeric
    Instructions
    1. Preheat oven to 450°.
    2. Pour olive oil, lemon juice, salt, turmeric and sugar into a gallon size Ziplock bag. Seal the bag and shake all ingredient to mix.
    3. Add the cauliflower florets, seal the bag again, and shake one more time to coat the cauliflower.
    4. Spread cauliflower on a foil-lined baking sheet or large disposable pan,
    5. Roast for 15 minutes. [br]
    Tips:
    1. I like to get my cauliflower florets from Costco
    2. Sprinkle with chopped flat-leaf parsley before serving

    Like it? Pin it!

    Easy and Delicious Turmeric-Roasted Cauliflower Recipe

  • Simple Tortilla Pizza “Tortizza”

    Simple Tortilla Pizza “Tortizza”

    Quick and Easy 5 Minute Tortilla Pizza

    My house is always filled with kids — mostly hungry, growing boys who constantly crave snacks. My oldest son came up with a great idea — Tortilla Pizza or as they call it “Tortizza” — and it has become a quick and easy favorite. You can mix all the ingredients and get it in the oven in under two minutes, and the kids can choose their own toppings.

    I came across TortillaLand® tortillas while shopping at Walmart, and they are a wonderful base for these pizzas. The tortillas are made from five simple ingredients, with no preservatives. So this snack is not only delicious, but healthy as well. Hope your kids love these as much as mine do!
    This post is sponsored by TortillaLand Tortillas; however, all recipes and opinions are my own.

    Simple Tortilla Pizzas “Tortizza”
    Author: Momma Chef
    Prep time:
    Cook time:
    Total time:
    Serves: 1 Tortizza
    Ingredients
    • 1 TortillaLand Flour Tortilla
    • 1/4 cup marinara sauce
    • 1/4 cup shredded mozzarella cheese
    • Toppings (diced peppers and olives go great on these)
    Instructions
    1. Preheat oven to 400°.
    2. Place the tortilla on a small pizza pan.
    3. Spread sauce evenly over tortilla.
    4. Sprinkle the cheese evenly over the top and add your toppings.
    5. Bake in the oven until the cheese is melted and golden and the tortillas are crispy, about 7 minutes.[br]
    Tips:
    1. If you do not have a pizza pan you can place the tortilla directly on the middle oven rack.
    2. Let the tortilla sit for a minute after taking it out of the oven.

    Quick and Easy Tortilla Pizza

    Like it? Pin it!

    Quick and Easy Tortilla Pizza

  • Oh-So Delicious Mediterranean Drumsticks

    Oh-So Delicious Mediterranean Drumsticks

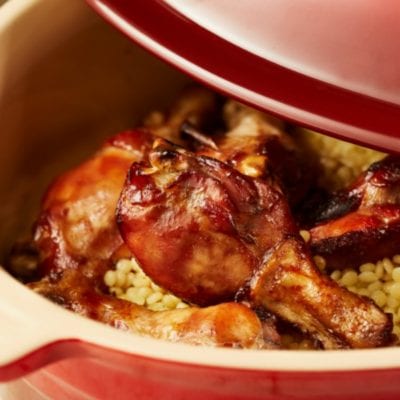
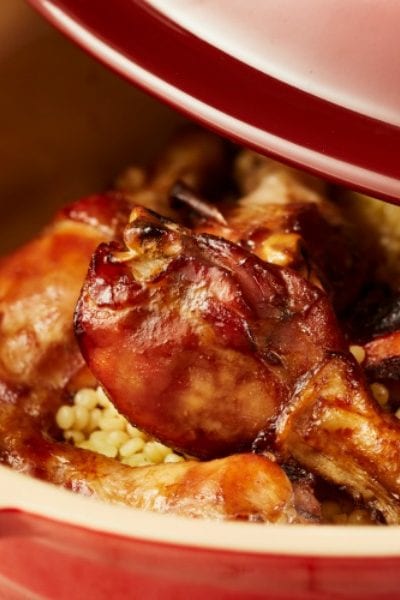
    This is such a fabulous recipe! When you have five minutes in the morning, mix the ingredients together in a Ziplock bag, add the chicken and let it marinate in the refrigerator during the day. Don’t worry, I have made it many times without letting it marinate and it is still delish! Because the recipe calls for drumsticks and they cook quickly, it’s an easy last-minute meal that your family is sure to love! I like to serve them over couscous, which makes for a beautiful presentation of the red drumsticks. Enjoy!

    Oh-So Delicious Mediterranean Drumsticks
    Author: Momma Chef
    Prep time:
    Cook time:
    Total time:
    Serves: 6
    Ingredients
    • 12 chicken drumsticks (about 4 1/4 pounds)
    • 1/2 cup red cooking wine
    • 1/4 cup bbq sauce (any variety)
    • 1/4 cup mustard
    • 5 cloves of garlic chopped
    Instructions
    1. Mix wine, bbq sauce, mustard and garlic in a large Ziplock bag.
    2. Add drumsticks to bag and, if possible, let it marinate several hours in the refrigerator.
    3. Pour all contents from the bag into a large baking pan making sure drumsticks are spread out in one layer.
    4. Bake uncovered for 40 minutes at 400 degrees, turning occasionally to brown both sides. [br]
    Tips:
    1. You can also make this in the slow cooker/crock pot. After marinating the chicken, pour everything in the pot and cook on low for 6 hours.
    2. If you are not able to marinate these drumsticks, just mix it all together in a pan and bake, it will still turn out delish!
    3. I like to use the large aluminum baking pans from Costco.
    4. This dish goes great with couscous and sautéed green beans.

    Quick and Easy Kid-Approved Mediterranean Drumsticks Recipe

  • Delicious No-Carb Tuna Salad

    Delicious No-Carb Tuna Salad

    Delicious No Carb Tuna Salad

    This post is sponsored by Blue Harbor Fish Co; however, all recipes and opinions are my own.

    At my house, we are all about taking care of each other. My recipes aim to do the same. No-Carb Tuna Salad made with Blue Harbor tuna will help you take care of you – your health, your waistline, and your world. And, might I add, it is absolutely eat-it-by-the-forkful delicious?

    Simply open a pouch of Blue Harbor, and you’ll know this will be no ordinary tuna salad. Free from preservatives and unnecessary salt,  this mild and delicious tuna elevates this recipe to the next level. With a seal of approval from the Marine Stewardship Council, Blue Harbor is committed to the protection and proliferation of sustainable fishing. How can I not love a company dedicated to taking care of the fish in the sea? With Blue Harbor’s commitment to sustainability paired with this tasty recipe, you can rest assured that this No-Carb Tuna Salad recipe can be passed on from generation to generation.

    Best of all, it’s a bonafide Momma Chef recipe.  Like all of my Momma Chef creations, it’s quick, easy, and scrumptious — with only five ingredients, you can whip up this tuna salad and have lunch in under five minutes!

    Delicious No-Carb Tuna Salad
    Author: Momma Chef
    Prep time:
    Total time:
    Serves: 2
    Ingredients
    • 2 packages Blue Harbor Wild Albacore Tuna in water
    • 1/4 cup real mayonnaise
    • 1/4 cup chopped celery
    • 1/2 tsp dried dill
    • small dash of onion salt–about 1/4 tsp (optional)
    Instructions
    1. In a large mixing bowl, combine tuna, celery, dill and mayonnaise.
    2. Mix until all ingredients are well combined.
    3. Slowly season with onion salt as desired.

    This is a sponsored post written by me on behalf of Blue Harbor Fish Co.

    Love it? Pin it!

    Delicious No Carb Tuna Salad

  • School Lunches for Picky Eaters

    School Lunches for Picky Eaters

    Tracking Pixel

    As parents, we are sometimes just as excited as our kids when school is out for summer. For us, that means no helping with homework, no rushing around in the morning and no packing of lunches. But as the summer nears the end, we realize the tasks ahead of us as the school year begins.

    Packing lunches does not need to be one of those dreaded tasks. Here are some helpful tips for putting together a delicious lunch in advance: Thanks to Stonyfield® Organic YoKids® yogurt for sponsoring this post so I can share my ideas!

    No “surprise” lunches.

    Try out new recipes on your kids first rather than surprising them with a *new* lunch. As a food blogger, I do this all the time.

    Use Sunday to prep.

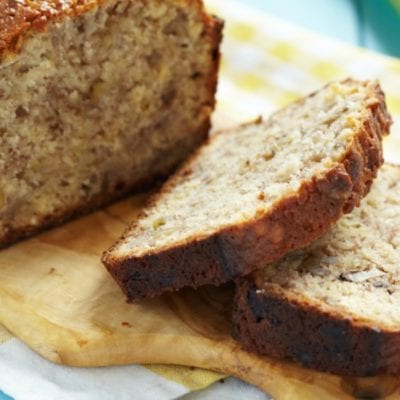
    When I find something they like, I’ll make that dish on a Sunday night. I make enough so I can pack individual lunches for a few days during the week. My kids lunch favorites are my Banana Muffins, Hidden Zucchini Muffins, Bourbon Chicken and Crispy Corn Flake Chicken.

    Stonyfield Organic YoKids yogurt make an easy lunch addition.

    My kid’s favorite packed lunch includes Stonyfield® Organic YoKids® yogurt. I particularly like this brand because all YoKids® products are Non-GMO Project Verified, which means they are always made without the use of toxic persistent pesticides, artificial hormones, antibiotics and GMOs. Not to mention, they are made with no high fructose corn syrup and 25-40% less sugar than the leading kids yogurt. For me, that means no guilt when the kiddos ask for a second.

    Keep it Cold

    Here is a great tip: Freeze a box of the Stonyfield® Organic YoKids® Squeezers and include one in the lunch box. By the time lunch rolls around, the yogurt will be defrosted but still cold. And it will keep the other lunch items cold, too.

    This is a sponsored post written by me on behalf of Stonyfield® Organic YoKids®.

    YUM!

    School Lunch Ideas for Picky Eaters

    School Lunch Ideas for Picky Eaters

    School Lunch Ideas for Picky Eaters


  • Homemade and Healthy Pasta Sauce in a Snap

    Homemade and Healthy Pasta Sauce in a Snap

    Homemade and Healthy Pasta Sauce in a Snap

    Like all busy moms, I love a good shortcut. However, shortcuts that fill my boys with unnecessary sugar are not worth the time saved. One surprising culprit of sugar is store-bought pasta sauce. Take a look at the label of your favorite and you will be shocked at how many grams of sugar are in one serving! Fortunately, I created a quick and tasty solution: an easy sauce that pairs fresh (or canned) tomatoes with Steviva Organic Infused Agave Nectar. Best of all, it’s a bonafide Momma Chef recipe. Like all of my Momma Chef creations, it’s quick, easy, and scrumptious — with only five ingredients, you can have this sauce in the pan in under five minutes! While it simmers, you can celebrate: your family will love this delicious sauce, and you will love serving a delicious and healthy meal with 75% fewer calories, carbs, and sugars.

    Homemade and Healthy Pasta Sauce in a Snap
    Author: Momma Chef
    Prep time:
    Cook time:
    Total time:
    Serves: 6
    Ingredients
    • 2 tablespoons olive oil
    • 1/4 cup diced onions (optional)
    • 1 teaspoon dried or freshly chopped oregano
    • 1 tsp [url href=”https://www.steviva.com/”]nectevia[/url]
    • 1 (28 ounce) can crushed tomatoes
    Instructions
    1. In a large skillet over medium heat, saute chopped onion in oil until tender, 2 minutes.
    2. Stir in oregano, entire can of crushed tomatoes and nectevia.
    3. Partially cover skillet and cook 15 to 20 minutes, until slightly thickened.
    4. Season with salt to taste.
    5. You can serve immediately or puree in blender for a smooth sauce (my kids like it this way).

    You can get more information about Steviva by following their social media channels!

    Facebook
    Twitter
    Instagram

    Love it? Pin it!

    Quick and Easy Pasta Sauce

  • 5 Minute Delicious Chocolate Bark + Video

    5 Minute Delicious Chocolate Bark + Video

    Quick and Easy Chocolate Bark

    For all those times a friend calls and asks you to bring over a dessert and you stop to realize that you don’t have anything in the house. Well, yes you do and here is the recipe for it! Chocolate bark is my “go-to” dessert and chances are that everything you need is already in the pantry. It is so easy to make and really one of the best last minute desserts. Our favorite combination is marshmallow and raisins with semi-sweet chocolate. This is also a great recipe to make with the kids! Check out Momma Chef’s video for step-by-step instructions.

    5 Minute Yummy Chocolate Bark
    Author: Momma Chef
    Prep time:
    Total time:
    Serves: 6
    Ingredients
    • 1 cup (8 oz.) semi-sweet chocolate chips
    • 1 cup mini marshmallows
    • 1/3 cup raisins
    Instructions
    1. Spray a small disposable pan (9X13) with Pam.
    2. Pour chocolate chips into a microwave safe bowl and microwave on high for 1:30
    3. Mix and microwave for another 1:30 minute until all chocolate is melted.
    4. Pour in marshmallows, stirring as you pour.
    5. Then mix in the raisins and make sure all raisins and marshmallows are coated in chocolate.
    6. Spread mixture into greased pan and refrigerate at least 30 minutes until set.
    7. Break up the chocolate bark and enjoy!


    https://www.youtube.com/watch?v=vFIk9C_Jd3s&feature=youtu.be

  • Quick and Easy Noodle and Rice Pilaf Dish

    Quick and Easy Noodle and Rice Pilaf Dish

    This is a great recipe if you need a new side dish or want something yummy to bring over to a friend’s home. It’s plain enough that even the pickiest kids will love it. For entertaining, sprinkle some herbs on top, put the rice in a pretty bowl, and you have a beautiful and tasty dish! Enjoy!

    Amazing Noodle and Rice Pilaf Dish
    Author: Momma Chef
    Prep time:
    Cook time:
    Total time:
    Serves: 6
    Ingredients
    • 3 tablespoons olive oil
    • 8 oz fine noodles
    • 2 cups instant rice
    • 3 cups chicken broth
    • 1 package Lipton Onion Mix
    Instructions
    1. Heat a large skillet over medium-high heat, add 3 tbsp. olive oil. Add the noodles, lower the heat to medium, and cook, stirring constantly for 3 minutes.
    2. Add the rice, stir to combine.
    3. Stir in the chicken broth and onion mix. Bring the mixture to a boil then cover and reduce the heat to low, and simmer for 15-20 minutes, or until the rice and noodles have absorbed all the liquid.
    4. Fluff with a fork and serve.

    Quick and Easy Noodle and Rice Pilaf Recipe

  • The Best Baked Salami

    The Best Baked Salami

    This recipe will be the hero of your appetizer table. The intensity of the mustard, the sweetness of the jam and the salty goodness of the salami create a tantalizing treat for your taste buds. If you’re serving this for a larger crowd, I suggest making two salamis. You’ll see how fast they go! Let the record show that I almost single-handedly devoured this ambrosial concoction the first time I had it at a friend’s house. She intervened—perhaps in fear that I would lick the plate clean—and kindly shared this legendary recipe with me.

    If you’ve never bought a whole salami before, don’t fret. They are available in every major grocery store; just ask someone in the deli department to help you find them.

    Best Baked Salami
    Author: Momma Chef
    Prep time:
    Cook time:
    Total time:
    Serves: 10 for appetizer
    Ingredients
    • whole salami – 2 lbs.
    • 8 oz jar Grey Poupon mustard (gluten-free variety can be used)
    • 12 oz bottle of apricot jam
    Instructions
    1. Preheat oven to 300 degrees.
    2. Partially slice the salami into 1/4-inch thick slices, making sure the cuts do not go all the way through.
    3. Place the salami into a baking dish or aluminum pan
    4. In a separate bowl, mix jam and mustard and spread ¼ cup of the mixture over the scored salami. Save the rest of the mixture to serve on the side as dipping sauce.
    5. Bake salami for 45 minutes. [br]
    Tips:
    1. When finished, I like to cut the salami into small squares and serve with toothpicks as an appetizer.
    2. This can be made the day before and reheated at 300 degrees for 15 minutes.

    Like this recipe? Pin it!


  • Crispy Eggplant Rounds

    Crispy Eggplant Rounds

    Quick and Easy Crispy Eggplant

    I had a beautiful eggplant in the refrigerator and was planning to serve it that evening when I was having family over for dinner. I wanted to come up with something a bit more interesting than grilled or sautéed eggplant, so I figured I would quickly try to come up with a new recipe. Crispy Eggplant Rounds was created and was a hit with the family! This is a great recipe if you need a new side dish or want something yummy to bring over to a friend’s home. For entertaining, drizzle balsamic glaze over eggplant, arrange the rounds in a pretty serving dish, and you have a beautiful and tasty side! My kids like to dip in marinara or barbecue sauce. Enjoy!

    Crispy Eggplant Rounds
    Author: Momma Chef
    Prep time:
    Cook time:
    Total time:
    Serves: 6
    Ingredients
    • 1 large eggplant cut into thick rounds (about 3/4″ thick)
    • 1/2 cup whole wheat flour
    • 2 tsp Lawry’s Seasoning Salt
    • 1 tsp cumin
    • 1/3 cup olive oil
    Instructions
    1. Soak eggplant rounds in water for about 3 minutes.
    2. While eggplant is soaking, mix flour, salt and cumin in a large Ziplock bag.
    3. Heat oil over medium heat in large skillet.
    4. Drain eggplant and shake in flour mixture so eggplant is coated.
    5. Once the oil is hot, drop eggplant rounds in oil and cook for 3 minutes per side.
    6. **For a low-carb version, after shaking the eggplant in the flour mixture, place the rounds onto a greased baking sheet and bake at 400 degrees for 20 minutes, or until golden brown and crisp.