Blog

  • Best Ever and Kid-Friendly Easy Split Pea Soup

    Best Ever and Kid-Friendly Easy Split Pea Soup

    Best Ever and Kid-Friendly Easy Split Pea Soup

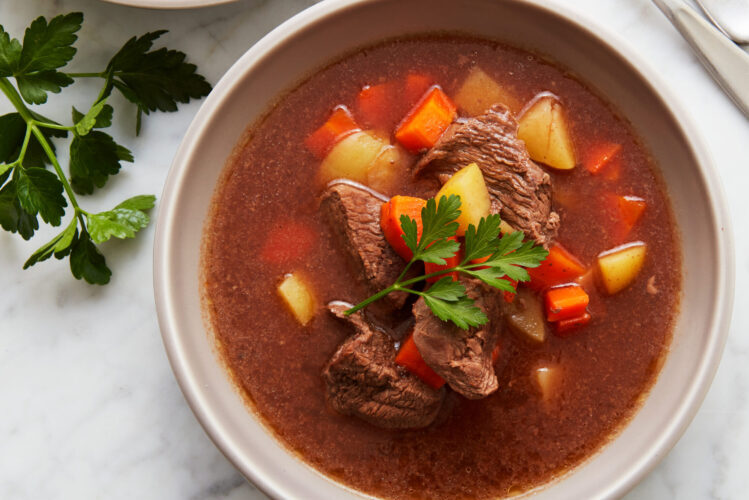
    Looking for an easy way to get your kids to eat their veggies–try this amazing soup that they are sure to love! It did take a bit of convincing to get my kids to try this soup, but miraculous all 3 loved it and have been eating it for years! A great way to get kids to try this soup is to let them add in some small croutons, as long as they are getting all of these veggies..what’s a few more carbs!

    Best Ever and Kid-Friendly Easy Split Pea Soup
    Author: Momma Chef
    Prep time:
    Cook time:
    Total time:
    Serves: 8-10
    Ingredients
    • 1 cup dried green split peas (or any variety of dried peas)
    • 2 tbsp. olive oil
    • 8 oz. bag of baby carrots
    • 1 chopped onion
    • 6 cups (48 oz.) vegetable broth
    • 2 tsp fresh, frozen or dried dill
    Instructions
    1. In a large saucepan, sauté the onion in olive oil over medium heat for 3 minutes.
    2. Add in the peas and carrots and cook another 2 minutes.
    3. Add the vegetable broth and dill and mix.
    4. Cover partially and cook over medium heat for 45 minutes until peas are very tender.
    5. Puree soup in blender, food processor or soup emersion in batches until smooth.
    6. This recipe can be made in the slow-cooker/crock pot, just follow the first step of sauteeing the onions then put everything in the pot and cook on low for 6 hours.[br]
    Tips:
    1. You can increase or decrease amount of carrots
    2. Make sure you blend this soup so the kiddos don’t see the hidden veggies!
    3. A great way to get kids to try this soup is to let them add small croutons, as long as they are getting all of these veggies..what’s a few more carbs!

    Best Ever and Kid-Friendly Easy Split Pea Soup

  • Simple Roasted Whole Chicken

    Simple Roasted Whole Chicken

    Super Quick and Easy Whole Roasted Chicken

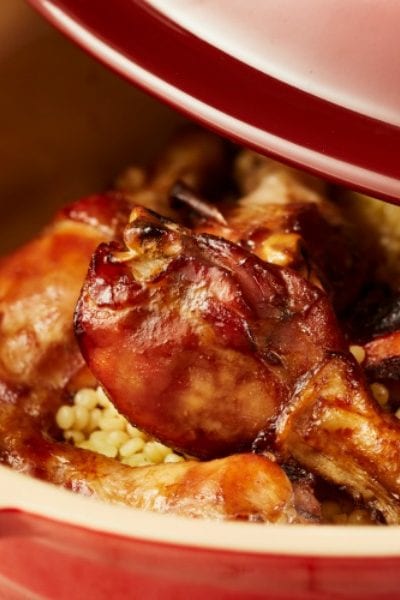
    This is one of the easiest recipes for chicken you will make. It’s almost easier than going to the store and buying a rotisserie chicken and you get this hot straight out of the oven. Don’t forget to eat the cooked oranges!

    Simple Roasted Whole Chicken
    Recipe Type: Dinner
    Author: Momma Chef
    Prep time:
    Cook time:
    Total time:
    Serves: 4-6 servings
    Ingredients
    • 2 1/2 -3 1/2 pound whole chicken
    • 2 oranges cut into quarters
    • 1/3 cup olive oil
    • 2 tablespoons McCormick Rotisserie Chicken Seasoning
    • 16 oz. chicken stock (typically 1/2 of a box)
    Instructions
    1. Preheat oven to 400 degrees F. Place chicken in a roasting pan.
    2. Rub olive oil on the outside of the chicken and sprinkle with the Rotisserie Seasoning.
    3. Place orange slices in the chicken cavity and around the pan then pour the chicken stock into the bottom of the pan
    4. Bake uncovered on lower rack for 1 hr 15 minutes
    5. Serve with sauce from the pan.[br]
    Tips & Tricks:
    1. If you do not have a roasting pan, use a medium size disposable pan (I get mine at Costco).
    2. If you can’t find the McCormick Seasoning, use 1 tablespoon salt and ½ tablespoon paprika.
    3. When the chicken is done cooking, if you have time to let it sit for 10 minutes before cutting that’s ideal, if not, it will still be delicious!
    Like it? Pin it!

    quick and easy simple roasted whole chicken recipe

  • The Dangerous Cooking Mistake We Make In the Kitchen

    When handling raw chicken or turkey, you absolutely do not need to rinse raw poultry before cooking, that is just a myth. Rinsing poultry only spreads bacteria and the chance of salmonella into your sink! Instead, just take raw poultry straight from the package into the cooking pan. Then simply clean up any splashes and wash your hands with soap and hot water.

    Tip When Cooking Raw Chicken or Turkey

  • Cedar Planked Parmesan Encrusted Salmon

    Cedar Planked Parmesan Encrusted Salmon

    Quick and Easy Cedar Planked Parmesan Salmon

    This is a fabulous summertime family meal, simple and tasty. I love the smell of grilling on Cedar plank- but don’t forget to first soak it in water, you don’t want your first experience to go up in flames–literally!

    You will find Cedar planked salmon on many restaurant menus, yet it’s so easy — not to mention less expensive — to make at home. This is one of my favorite ways to prepare it.

    For those that do not cook salmon often, I will let you in on a little secret; salmon is not only delicious, it is rich in omega-3 fats which help boost your brain and cardiovascular health.

    And like all of Momma Chef’s creations, this recipe is quick, easy and scrumptious. With only 4 ingredients, you can whip this up in under 5 minutes prep time!

    Cedar Planked Parmesan Encrusted Salmon
    Author: Momma Chef
    Prep time:
    Cook time:
    Total time:
    Serves: 6
    Ingredients
    • 1 lb. fresh salmon filet (skin removed)
    • 1/3 cup low-fat mayonnaise
    • 1/3 cup grated parmesan cheese
    • 1-1/2 teaspoons finely chopped fresh basil
    • 2 tsp. lemon juice
    Instructions
    1. Fill a large bowl or sink with water. Soak the cedar plank under the water for at least 1 hour.
    2. In a bowl, combine the mayonnaise, chopped basil, and parmesan cheese.
    3. Pat the soaked plank dry and place the salmon on top and cover salmon in the parmesan marinade.
    4. Drizzle with lemon juice.
    5. Place the plank on the grill grates, close the cover and cook for 10 to 15 minutes, or until salmon is done to your liking.
    6. If the plank catches on fire, just mist the plank with water.

    Like it? Pin it!

    Quick and Easy Cedar Planked Parmesan Salmon

  • 3 Ingredient Chicken Wings

    3 Ingredient Chicken Wings

    Was Confucius discussing my chicken wing recipe when he extolled simplicity? Who’s to say? This recipe definitely embraces his ancient words of wisdom: Why complicate simple perfection? With just three ingredients, you, too, will be blown away by this scrumptious appetizer.

    If one of my son’s friends samples these wings for the first time at our house, nine times out of ten, I’m going to get a call requesting the recipe. Hands down it’s my most popular dish and an absolute favorite of kids and adults alike. No football gathering is complete without these addictively tangy wings. I learned the hard way that I must make a separate tray for the kids; otherwise, my sons and their friends would never leave any for the adults. This appetizer easily transforms into the main dish as a family-favorite dinner.

    Easy and Delicious: 3 Ingredient Chicken Wings
    Author: Momma Chef
    Prep time:
    Cook time:
    Total time:
    Serves: 20 wings
    Ingredients
    • 2 pounds chicken wings
    • 1/3 cup Kikkoman Soy Sauce
    • 1/2 cup Barbecue Sauce, such as Sweet Baby Ray’s Barbecue Sauce
    Instructions
    1. In a large baking pan mix together Soy sauce and Barbecue Sauce.
    2. Add chicken wings into pan and cover chicken in sauce.
    3. Spread chicken in single layer and bake uncovered at 400 degrees for 40 minutes, then broil for 3 minutes to get them crisp.
    4. Optional, sprinkle with sesame seeds before serving.[br]
    Tips:
    1. If you don’t have any sesame allergies substitute plain teriyaki or soy vey instead of soy sauce.
    2. I use a large disposable pan (get them at Costco).
    3. You can substitute wings for small chicken drummettes, which kids seem to prefer.

    Three Ingredient Chicken Wings

    Like this recipe? Pin it!

  • Homemade 5-minute Olive Tapenade

    Homemade 5-minute Olive Tapenade

    I have to admit, I am not a huge fan of olives– no judging — but my husband and boys can eat them by the handful. So, I figured I would try to create a quick and easy olive tapenade that I can throw together in the food processor and all the family would enjoy (well..most of the family). I normally taste everything I make and tweak it before it becomes an official “recipe” but this one I had to rely on my husband and several batches until it came out the way he liked it. I served it at a dinner party and it got rave reviews, so it’s time that I put this one on the blog. It will literally take you 5 minutes to throw together and tastes so much better than the store-bought versions. Enjoy!

    Homemade 5-minute Olive Tapenade
    Author: Momma Chef
    Prep time:
    Total time:
    Serves: 8
    Ingredients
    • 1/4 cup olive oil
    • 1 cup Mediterranean olives, pitted
    • 1 tbsp. lemon juice
    • 2 small cloves of garlic
    • 1 tsp. chopped thyme
    • 2 tsp. mayonnaise (optional)
    Instructions
    1. Combine all ingredients in a food processor, and pulse until mixture becomes coarse paste (stopping to scrape down the sides of the bowl).
    2. I did not include salt in the recipe, with the saltiness of the olives, taste before adding salt.

    Quick and Easy Olive Tapenade

  • Easy and Delicious 5-Minute Hummus Recipe

    Easy and Delicious 5-Minute Hummus Recipe

    Easy and Delicious 5-Ingredient Hummus

    This is one of my favorite go-to appetizers.  It’s so unbelievably simple to make and tastes so much better than the store bought brands, not to mention much healthier. I love to serve this with pita chips and usually add some paprika or chopped parsley right before serving.  This is one of those appetizers that you just cannot mess up! It always comes out delicious. Best served after refrigerated for several hours to let the ingredients combine. Enjoy!

    Author: Momma Chef
    Prep time:
    Total time:
    Serves: 8 servings
    Ingredients
    • 2 16 oz. Cans of chickpeas (reserve liquid from 1 can)
    • ½ cup Tahini paste
    • ½ cup olive oil
    • Juice of 1 lemon
    • 3 cloves of garlic
    • 1 tsp McCormick Seasoning Salt
    Instructions
    1. Pour in order, liquid from 1 can of chickpeas, olive oil, lemon juice, seasoning salt, tahini, 2 cans of drained chickpeas and garlic in a food processor or blender. Puree until smooth.[br]
    2. Sprinkle with paprika or chopped fresh parsley before serving (optional).

    Like this recipe? Pin it!

    Quick and Easy Hummus Recipe

  • Couldn’t Be Easier: Delicious London broil + A Video

    Couldn’t Be Easier: Delicious London broil + A Video

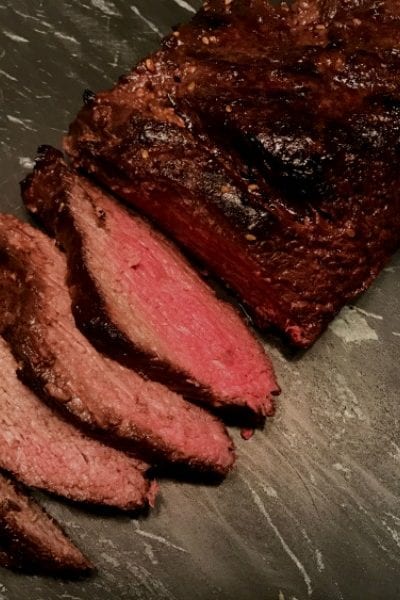
    As parents, we hope to instill in our children the importance of traditions. Many of our family traditions revolve around food. For example, our Sunday evening tradition has become a London broil dinner. All my kids love this meal — which is quite a miracle — and I hope it might become a tradition in your home, too.
    Prepare to impress with this delicious, super quick and easy four-ingredient London broil recipe.

    Couldn’t Be Easier: Delicious London broil
    Recipe Type: Dinner
    Author: Momma Chef
    Prep time:
    Cook time:
    Total time:
    Serves: 6
    Ingredients
    • 1 1/2-2 lb. London Broil or flank steak
    • 1 cup Italian dressing
    • 1/4 cup soy sauce (if making GF use Kikkoman GF Soy Sauce)
    • 1/4 cup honey
    Instructions
    1. Mix Italian dressing, honey and soy sauce in a large Ziploc bag.
    2. Add London broil to bag and, if possible, let it marinate several hours in the refrigerator.
    3. Grill on low heat 12 minutes each side (4 minute longer per side if you like it well done . . . but who likes it well done?!).[br]
    Tips and Tricks:
    1. This is a great recipe to quickly throw together in the morning and let marinate in the refrigerator during the day. Just put the meat in the oven or grill it when you get home.
    2. If you are living a cold climate and aren’t brave enough to grill in the winter (we Chicagoans grill in the snow), then preheat the oven to 375 degrees and bake the London broil on the lowest rack uncovered in a disposable pan for 45 min (+/- 15 minutes depending on preferred level of doneness)
    3. As always with red meat, let it sit for 5-10 minutes after cooking before cutting to seal in the juice.
    4. This London broil is great served with grilled asparagus and brown rice (my favorite is Trader Joe’s frozen brown rice)


    Super Quick and Easy London Broil Recipe a Kid Favorite

  • Roasted Eggplant and Pesto Dip

    Roasted Eggplant and Pesto Dip

    I first tasted roasted eggplant when I was traveling in another country and thought it was fabulous! I took notes on the different flavors because I wanted to create it once I got home. I even took photos of the beautiful presentation. After several attempts and the help of many taste-testers who were on the trip with me, I finally nailed it! It’s really a very simple recipe that is delicious with an exquisite presentation! Enjoy!

    Roasted Eggplant and Pesto Dip
    Author: Momma Chef
    Prep time:
    Cook time:
    Total time:
    Serves: 6-8
    Ingredients
    • 1 large eggplant
    • 2 tbsp. pesto
    • ¼ cup hummus dip (any brand)
    • ½ tsp. salt
    Instructions
    1. Adjust an oven rack to the middle position and preheat to 475 degrees.
    2. Place eggplant on aluminum foil and prick in several places using a fork.
    3. Bake eggplant 25 minutes on each side until eggplant is very soft, baking a total of 50 minutes.
    4. Remove eggplant from the oven and let it cool on the foil for 10 minutes.
    5. Move eggplant to a serving dish and slice it down the middle lengthwise, keeping the top intact.
    6. Open the eggplant and sprinkle with salt.
    7. Spread hummus over the flesh of the eggplant and pesto over the hummus. [br]
    Tips:
    1. This is best enjoyed immediately after making it.
    2. For an elegant look, chop up 2 tsp. fresh mint and sprinkle over the eggplant.
    3. Serve with plain pita chips.

    Like this recipe? Pin it!

  • Caramelized French Toast

    Caramelized French Toast

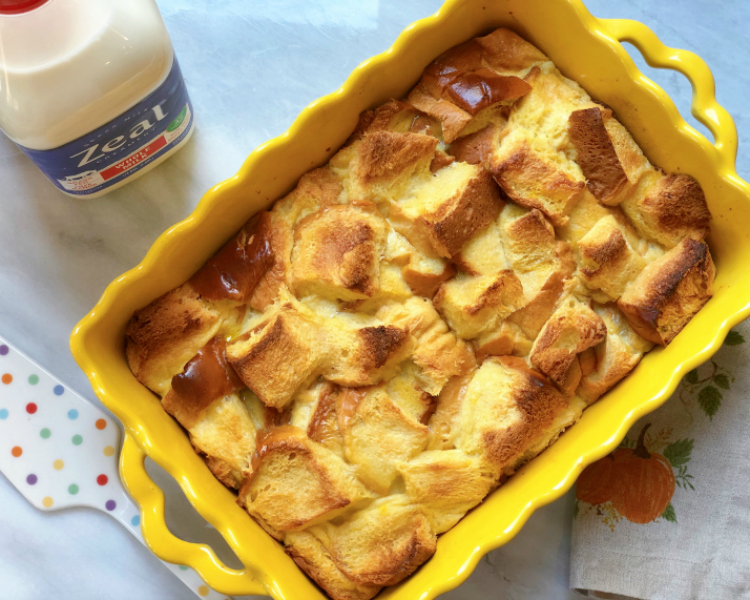
    Easy and Delicious Caramelized French Toast

    This was one of my first college “gourmet” specialties; caramelized French toast (Step one: drench French toast in sugar; Step two: add more sugar). Since that time, I have a lessened the sugar and like to add some fresh fruit to give some natural sweetness. It is a weekend favorite and super easy to make!

    Caramelized French Toast
    Author: Momma Chef
    Prep time:
    Cook time:
    Total time:
    Serves: 6
    Ingredients
    • 6 slices challah, brioche, white or whole-wheat bread
    • 1 tsp. vanilla
    • 3 eggs
    • 1/4 cup milk
    • 2 tsp. butter or Pam
    • 3 tbsp. sugar
    Instructions
    1. In a skillet, melt butter or spray Pam over medium heat.
    2. In a shallow bowl or container, whisk together the eggs, milk, and vanilla.
    3. Dip bread in egg mixture.
    4. Cook slices about 2 minutes on each side until golden brown.
    5. Before removing from the heat, sprinkle 1/2 tsp. sugar on the french toast, flip and cook 20 seconds.
    6. Do the same on both sides so the sugar has cooked into the French toast.
    7. Remove from heat and serve with fresh fruit or syrup.

    Quick and Easy Caramelized French Toast Recipe Makes a Great Weekend Breakfast

  • Simple and Kid-Approved Chili

    Simple and Kid-Approved Chili

    When my 8-year-old son – a picky eater — came home from school one day and asked me to make chili for dinner, I was ecstatic. I knew the recipe had to be kid-friendly (no green specs of anything could be visible), so that was the night my kid-approved chili was created. All my boys love this meal, which is quite a miracle!

    Simple and Kid-Approved Chili
    Author: Momma Chef
    Prep time:
    Cook time:
    Total time:
    Serves: 6
    Ingredients
    • 1 pound lean ground beef
    • 2 (15 oz.) cans crushed tomatoes
    • 1 can (15 to 16 oz.) kidney beans, drained
    • 1 packet McCormick Chili Seasoning, mild
    • 1 tsp. olive oil
    Instructions
    1. In a large pot, add 1 teaspoon oil and brown the meat over medium heat for 5 minutes, breaking up the meat as you stir.
    2. Pour in tomatoes, kidney beans and chili seasoning and stir to mix.
    3. Cover, turn the heat to medium-low and cook for an additional 30 minutes, stirring occasionally. [br]
    Tips:
    1. Add assorted toppings, such as shredded cheese, chopped onions or sour cream when serving.
    2. To reduce sodium, try with McCormick 30% Less Sodium Chili Seasoning Mix or 30% Less Sodium Mild Chili Seasoning Mix.
    3. If you like a bit more heat, add ¼ tsp. crushed red pepper.
    4. If you want to make this in a crockpot, add the oil on the bottom, the uncooked beef on the oil, the rest of the ingredients on top of the beef. Cook on high for 4 hours or on low for 6 hours.

    Fan of Yummly? Then check out Momma Chef’s recipes on Yummly, you can find them here: http://www.yummly.co/page/mommachef

    Quick and Easy Kid-Approved Chili Recipe

  • Oh-So Simple Beer-Can Chicken

    Oh-So Simple Beer-Can Chicken

    I live in a house chock-full of boys and have become well-versed in typical boy humor. Belching? They’ll definitely think that’s funny. Flatulence? Hysterical. I knew that all I had to do was tell my sons the alternate name of this popular dish—“Beer Butt Chicken”—and they’d immediately be fans.

    The first time I made this, I failed to secure the can properly, and my poor chicken toppled over, humiliated in a puddle of beer. Fortunately, it still tasted great. I’ve learned to double-check the stability of the can and to give a mid-bake oven check to make sure the chicken doesn’t get tipsy. If you don’t like the taste of beer, no worries. The beer evaporates into the cavity of the chicken while it’s cooking, making the chicken unbelievably moist and flavorful.

    Oh-So Simple Beer-Can Chicken
    Author: Momma Chef
    Prep time:
    Cook time:
    Total time:
    Serves: 4-6
    Oh-So Simple Beer-Can Chicken Author: Momma Chef Prep time: 5 mins Cook time: 1 hour 15 mins Total time: 1 hour 20 mins Serves: 4-6
    Ingredients
    • 1 whole chicken, about 4 pounds
    • 1 tablespoon extra-virgin olive oil
    • 1 tablespoon seasoning salt
    • 2 tablespoons rotisserie chicken seasoning, such as McCormick
    • 1 (12-ounce) can of beer (if making gluten free, use a gluten-free beer)
    Instructions
    1. Preheat the oven to 375°F.
    2. Place the rack in the lowest position in the oven.
    3. Rub the chicken inside and out with the oil, seasoning salt and rotisserie seasoning.
    4. Pour half of the beer into the bottom of a deep baking dish.
    5. Place the open beer can with the remaining beer in the center of the baking dish, and carefully place the chicken over the beer can with the legs on the bottom. (See photo for correct positioning.)
    6. Bake uncovered for 1 hour 30 minutes, checking occasionally that the chicken is still standing up over the beer can.

    Like this recipe? Pin it!